From fixing leaky faucets to replacing water heaters, plumbing repair services are an indispensable need for homeowners. When a plumbing project is completed, a clear and detailed plumbing invoice is necessary to outline the work performed and materials used while tracking payment. For many plumbers, creating professional invoices may not be a core expertise. However, having well-designed plumbing invoice templates can take the guesswork out of billing and ensure all projects are documented properly.
This prevents potential misunderstandings and provides homeowners with documentation for their records. Beyond detailing costs, an effective plumbing invoice also reinforces your business’ brand and professionalism. This article will examine the key components of plumbing invoices from summarizing work completed to specifying payment terms and timeline. To streamline your invoicing process, customizable plumbing invoice templates will be provided covering standard repairs and installations. With these tools, plumbers can keep accurate accounting for their services rendered and maintain clarity with customers.
Table of Contents
What Is A Plumbing Invoice?
![Free Printable Plumbing Invoice Templates [Excel, PDF] 1 Plumbing Invoice](https://www.typecalendar.com/wp-content/uploads/2023/08/Plumbing-Invoice-1024x576.jpg 1024w, https://www.typecalendar.com/wp-content/uploads/2023/08/Plumbing-Invoice-300x169.jpg 300w, https://www.typecalendar.com/wp-content/uploads/2023/08/Plumbing-Invoice-768x432.jpg 768w, https://www.typecalendar.com/wp-content/uploads/2023/08/Plumbing-Invoice-1536x864.jpg 1536w, https://www.typecalendar.com/wp-content/uploads/2023/08/Plumbing-Invoice-1200x675.jpg 1200w, https://www.typecalendar.com/wp-content/uploads/2023/08/Plumbing-Invoice.jpg 1920w)
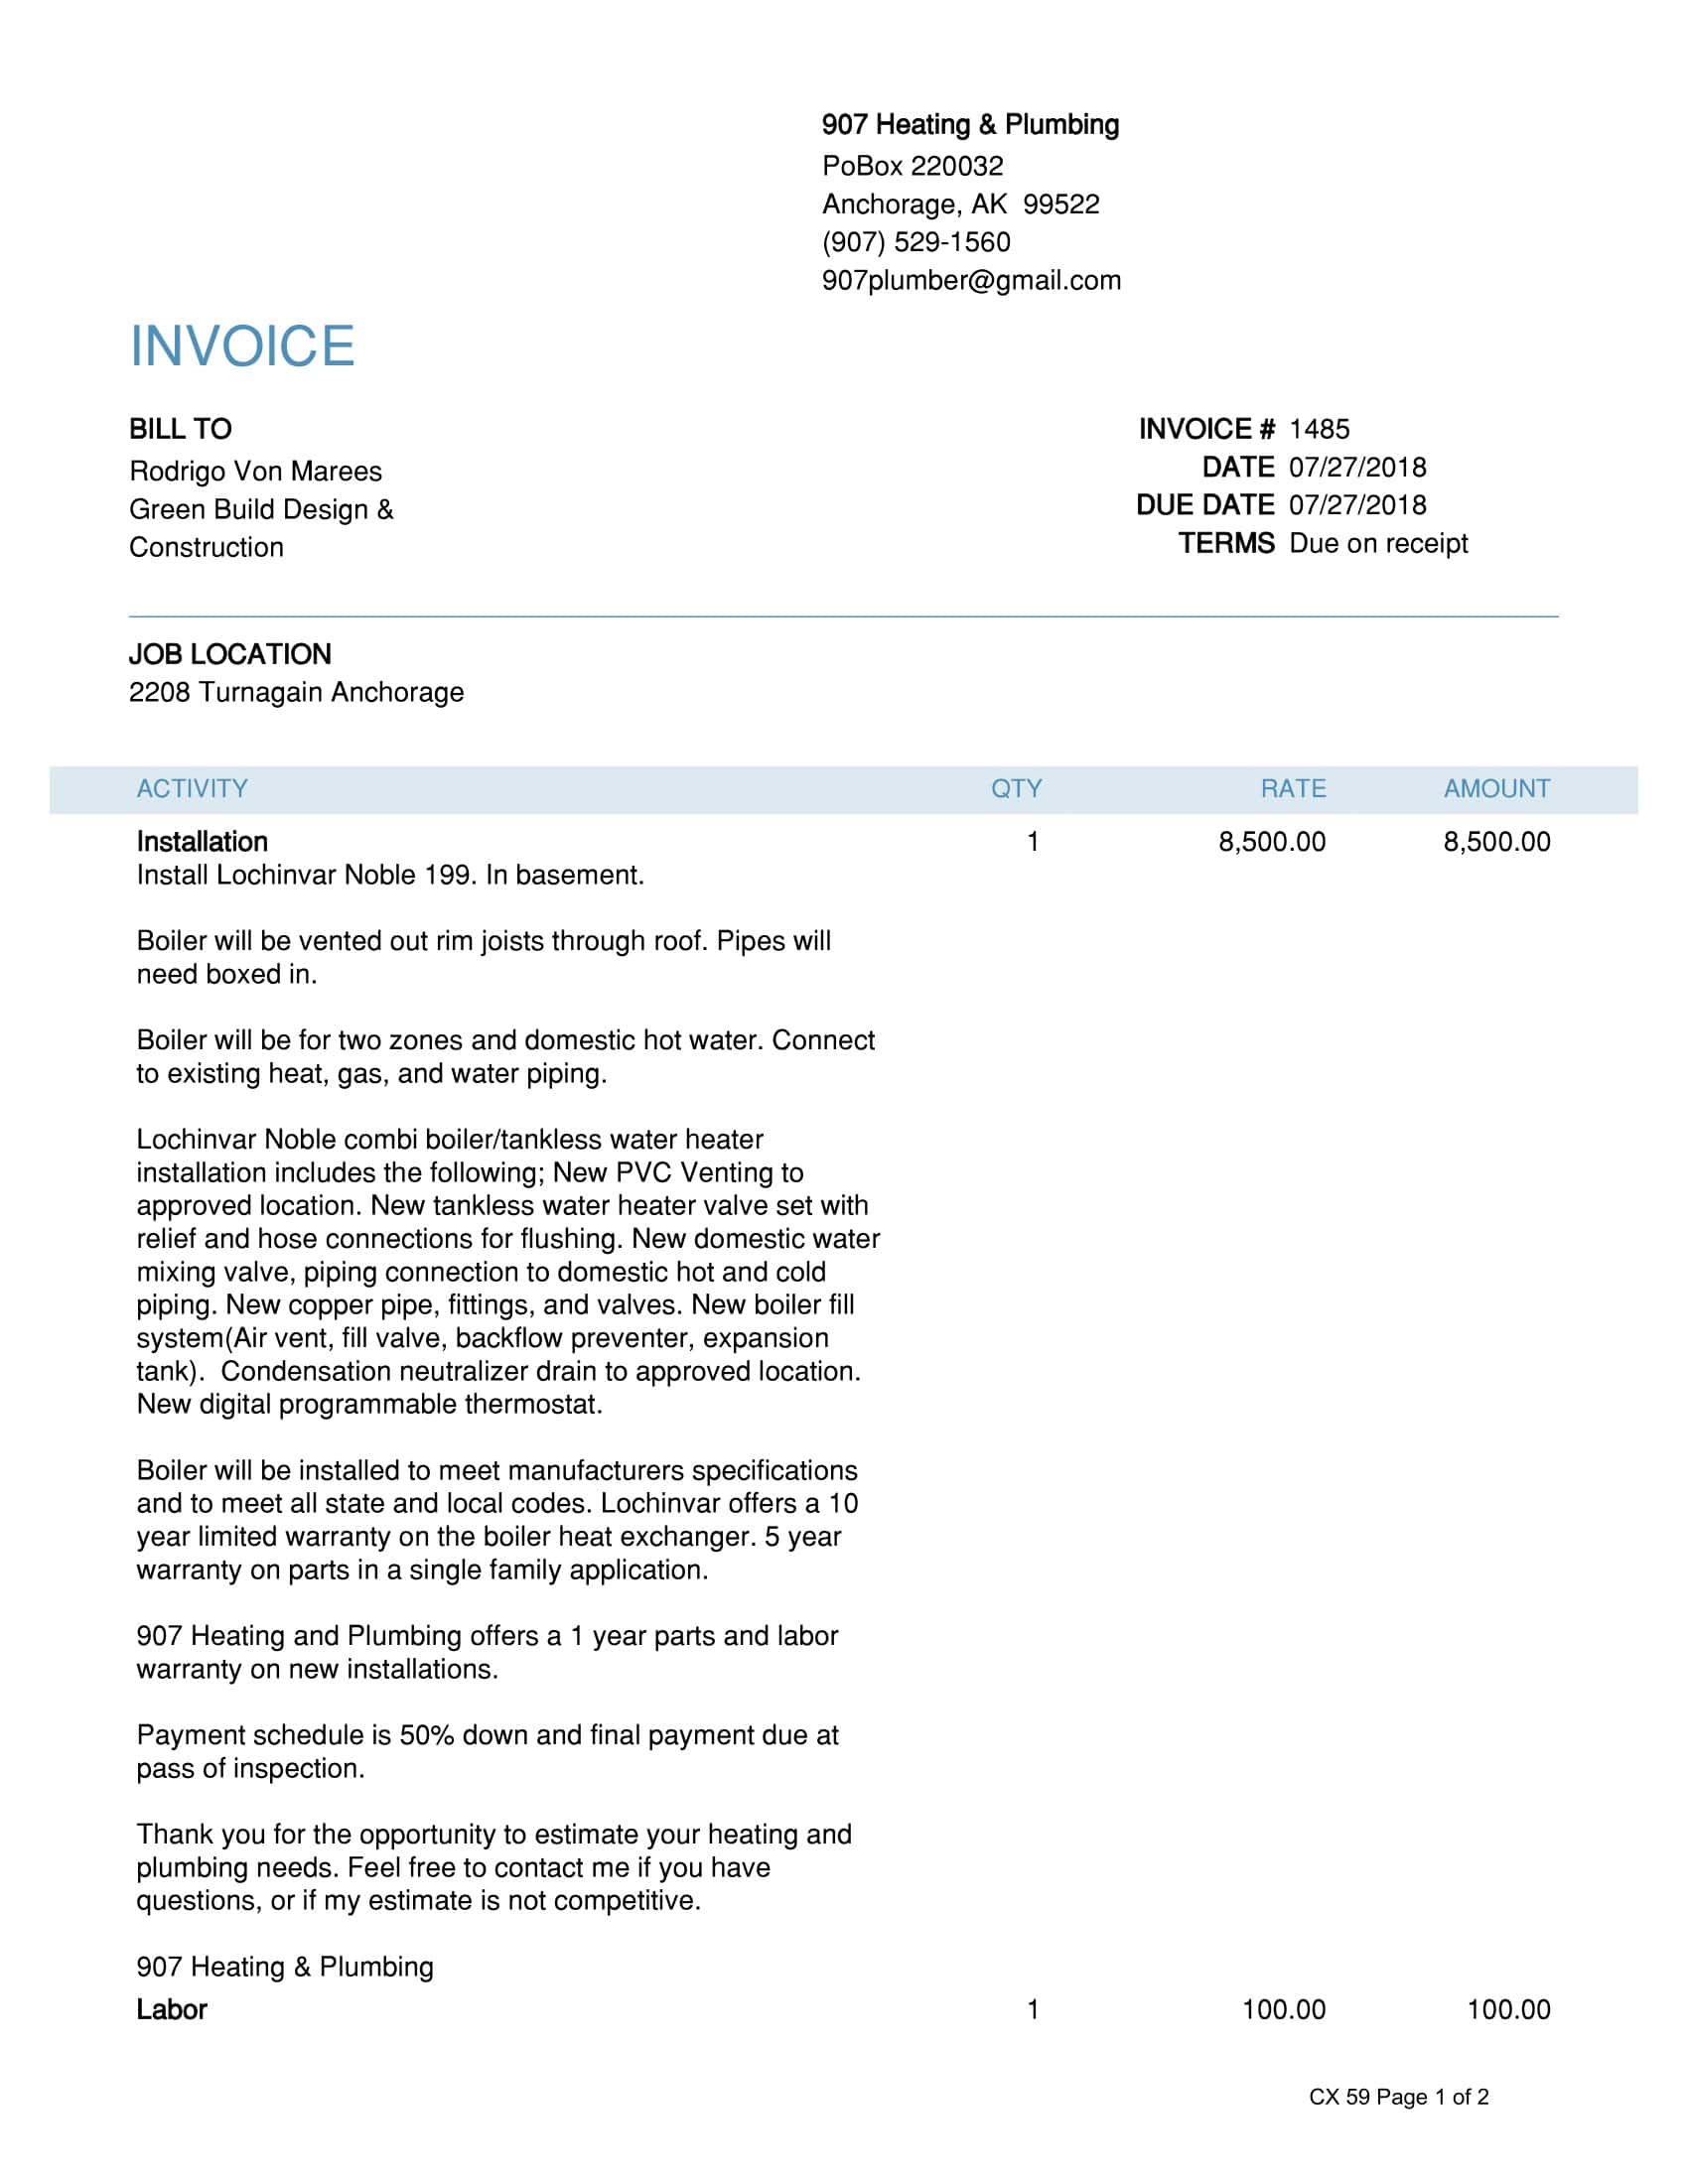
A plumbing invoice is a bill sent by a plumber or plumbing company to a customer after completing work, detailing the services provided, parts installed or replaced, materials used, and total charges due. It itemizes labor time, itemizes parts and supplies, applies any discounts or taxes, and states payment terms and due date.
A plumbing invoice acts as a request for payment while also creating a record of work performed and providing customers with documentation of the plumbing services rendered. Both the plumber and customer retain copies of the plumbing invoice for their records for future reference. A clear, accurate plumbing invoice is an essential business document that outlines the transaction and ensures the plumber receives fair payment while maintaining a professional relationship with the client.
Plumbing Invoice Templates
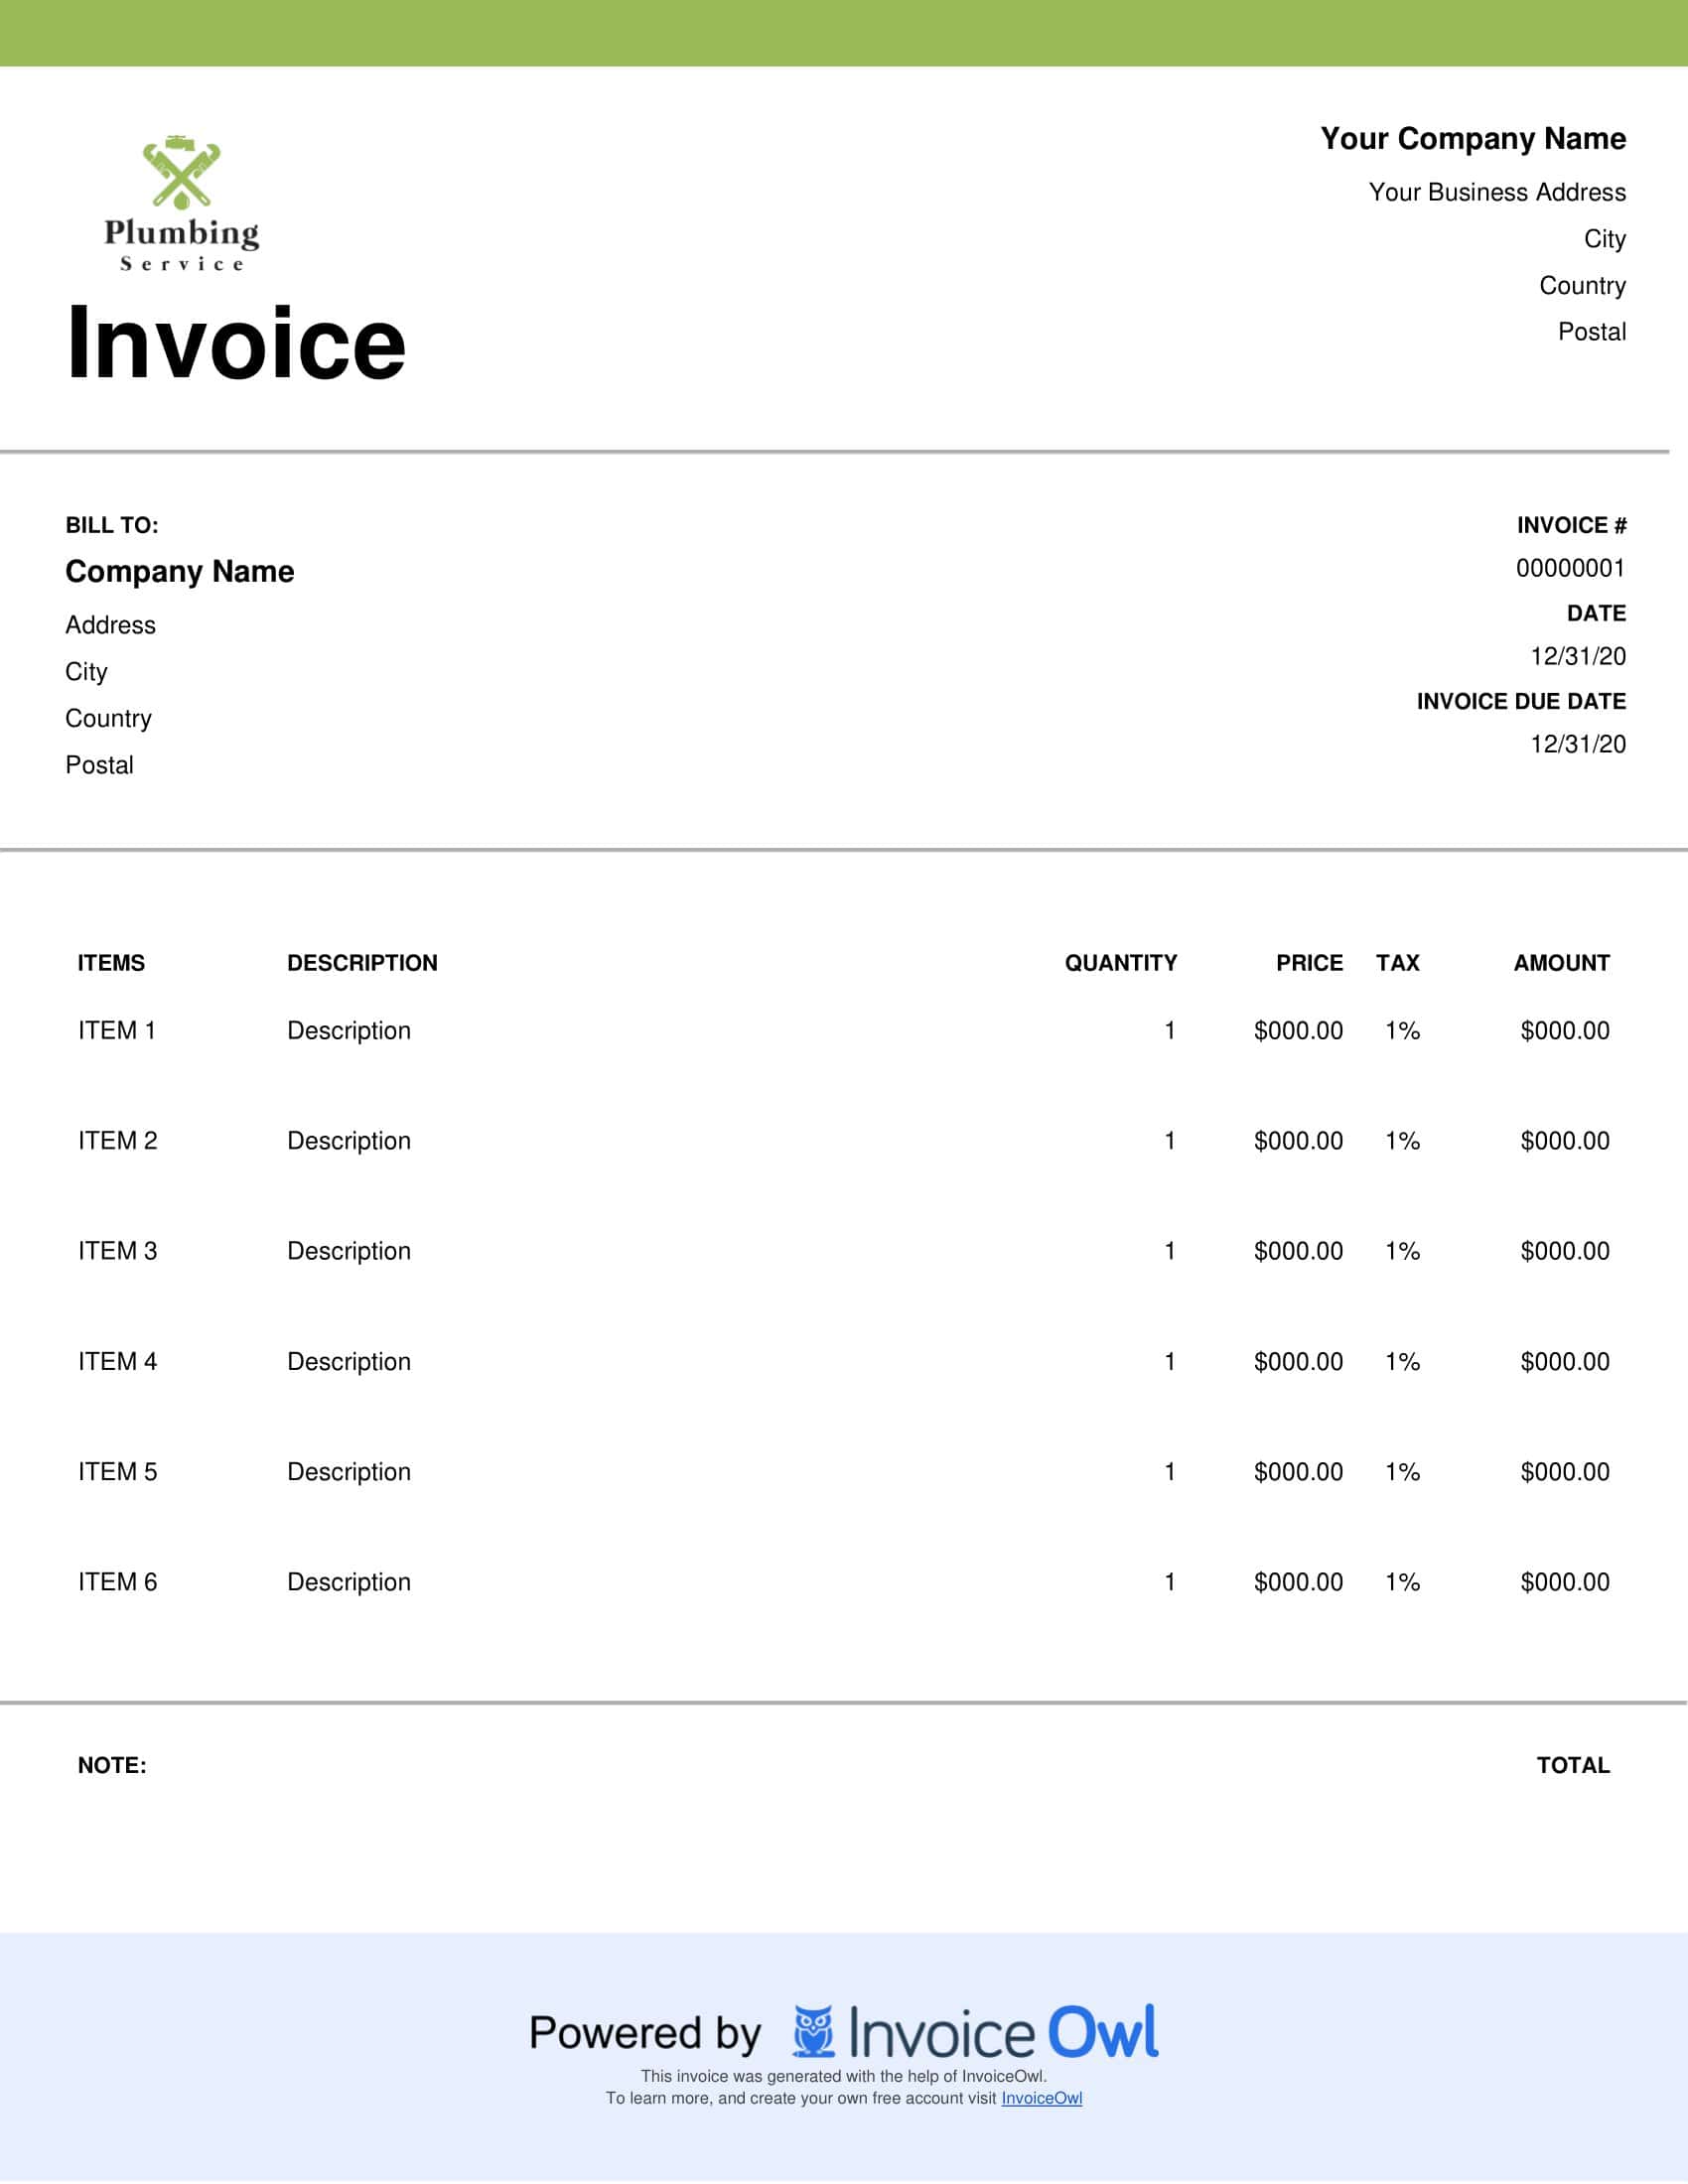
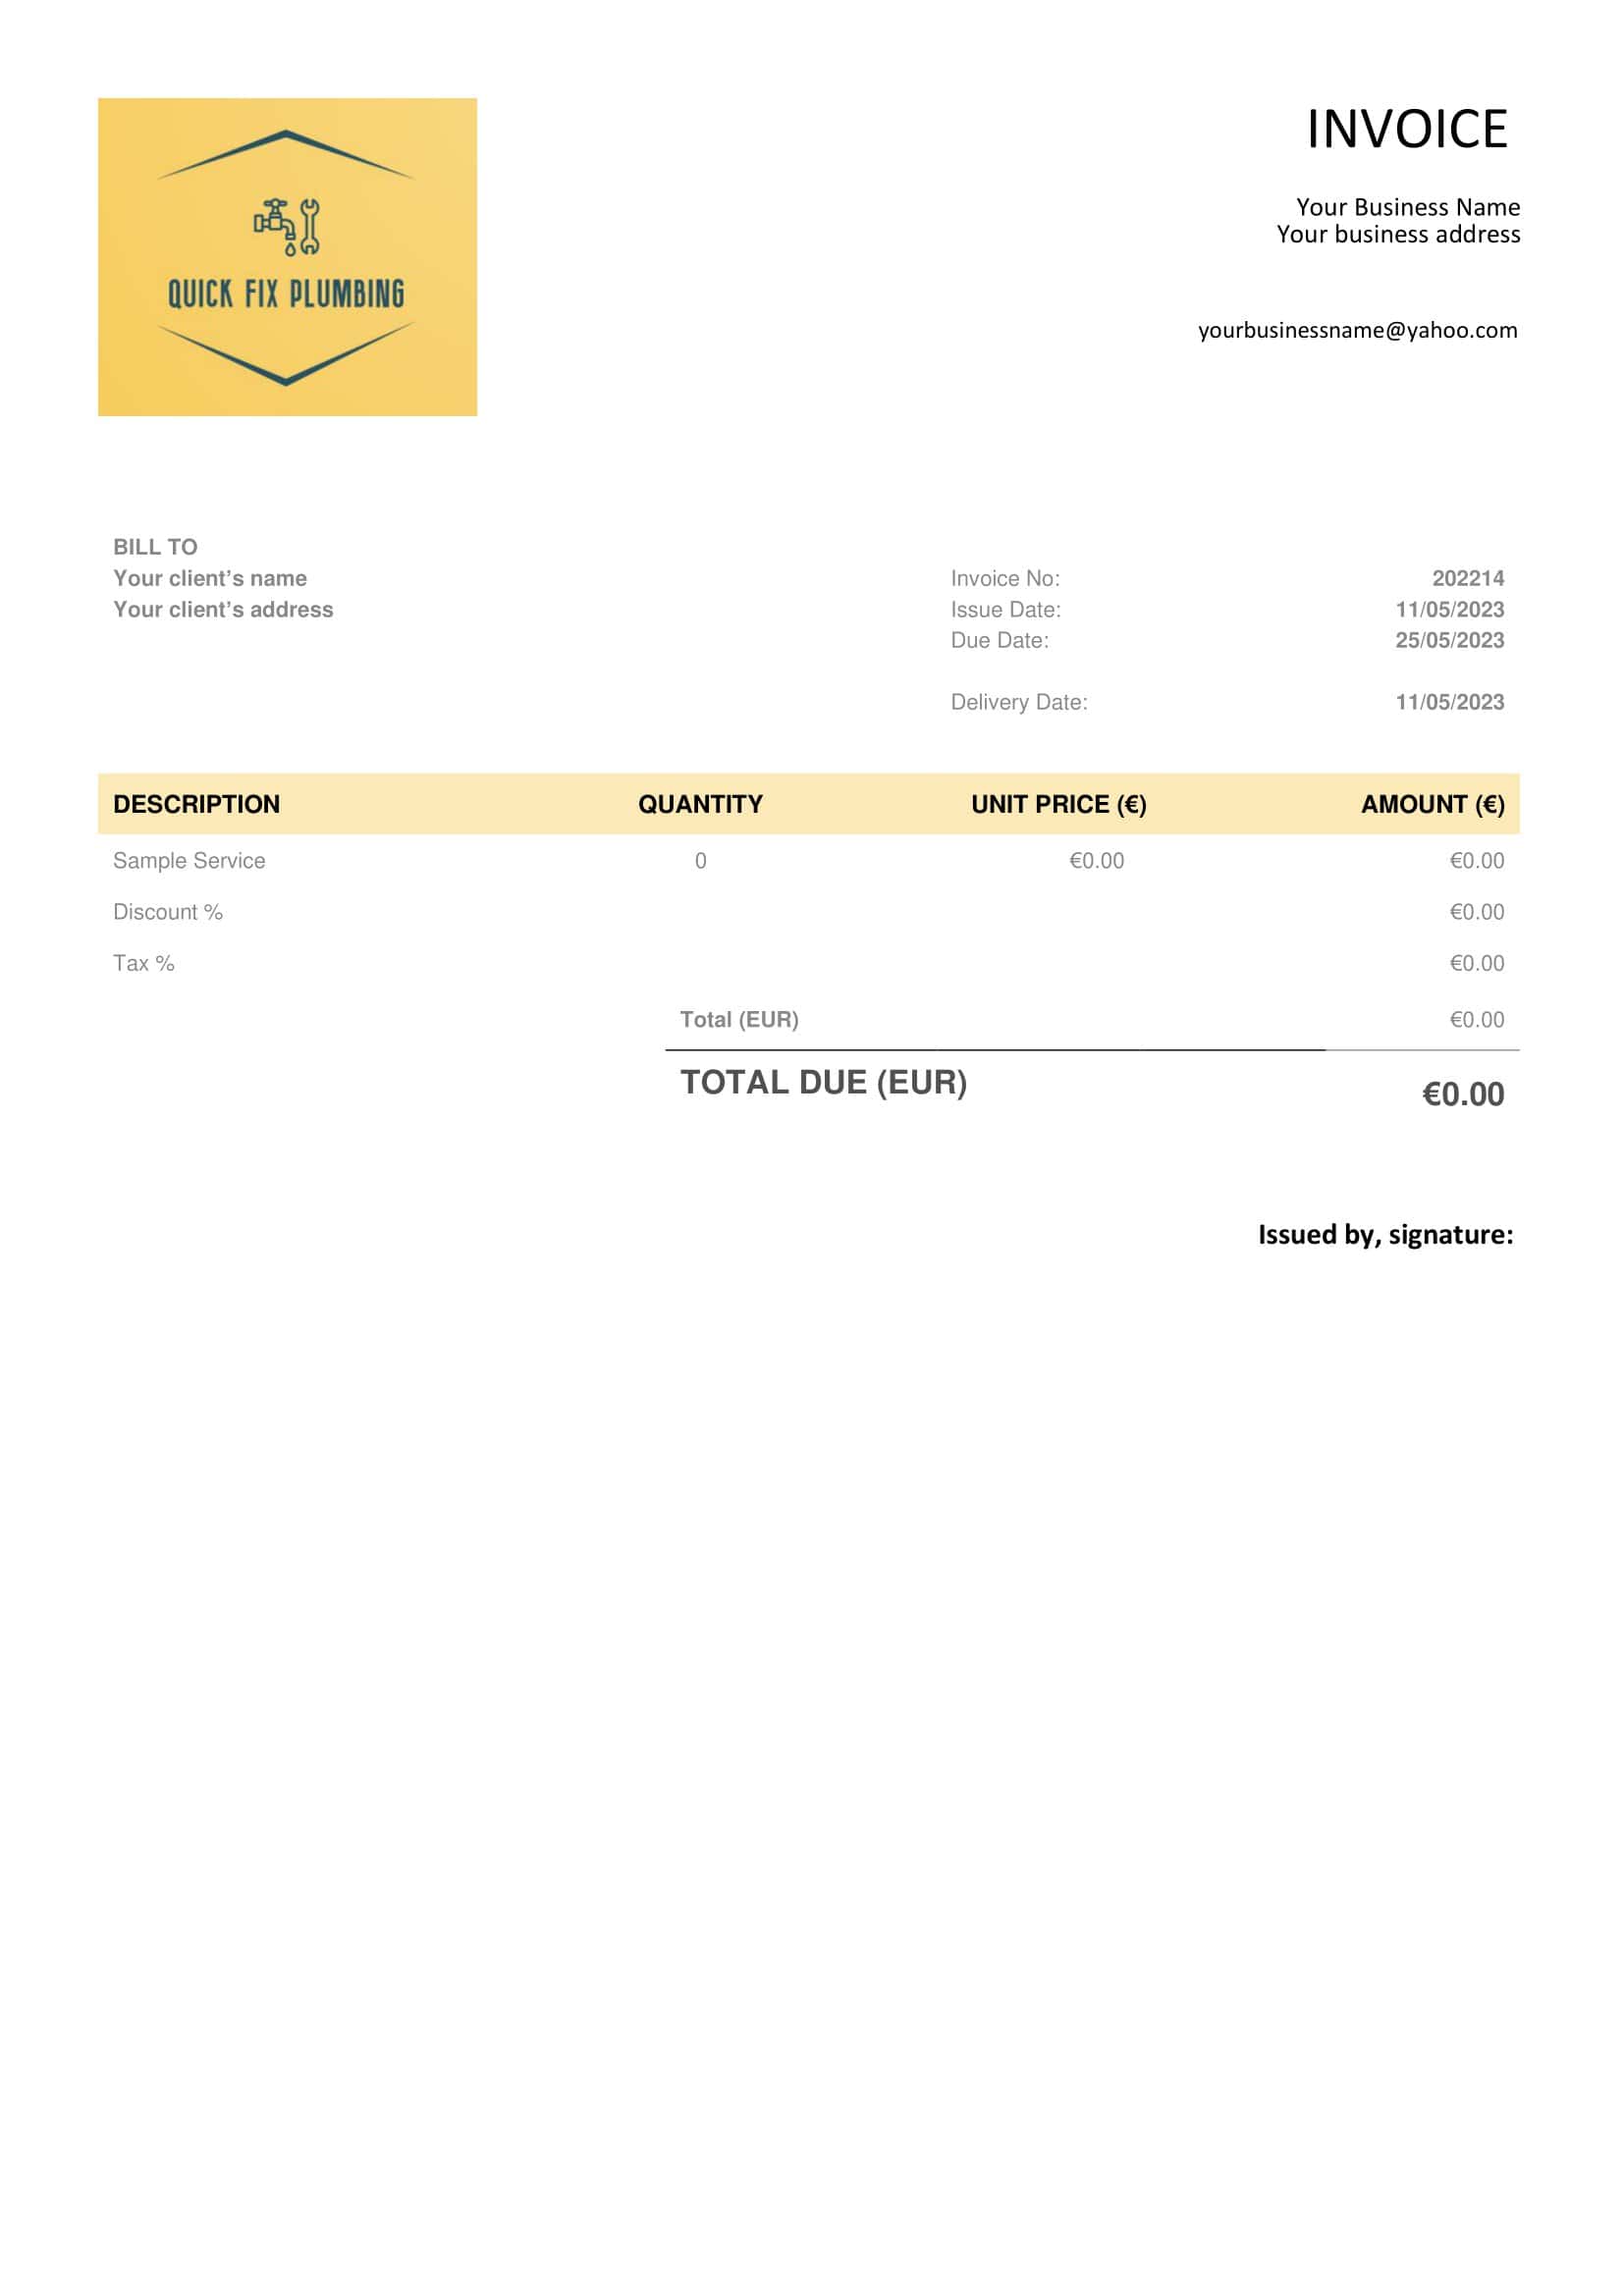
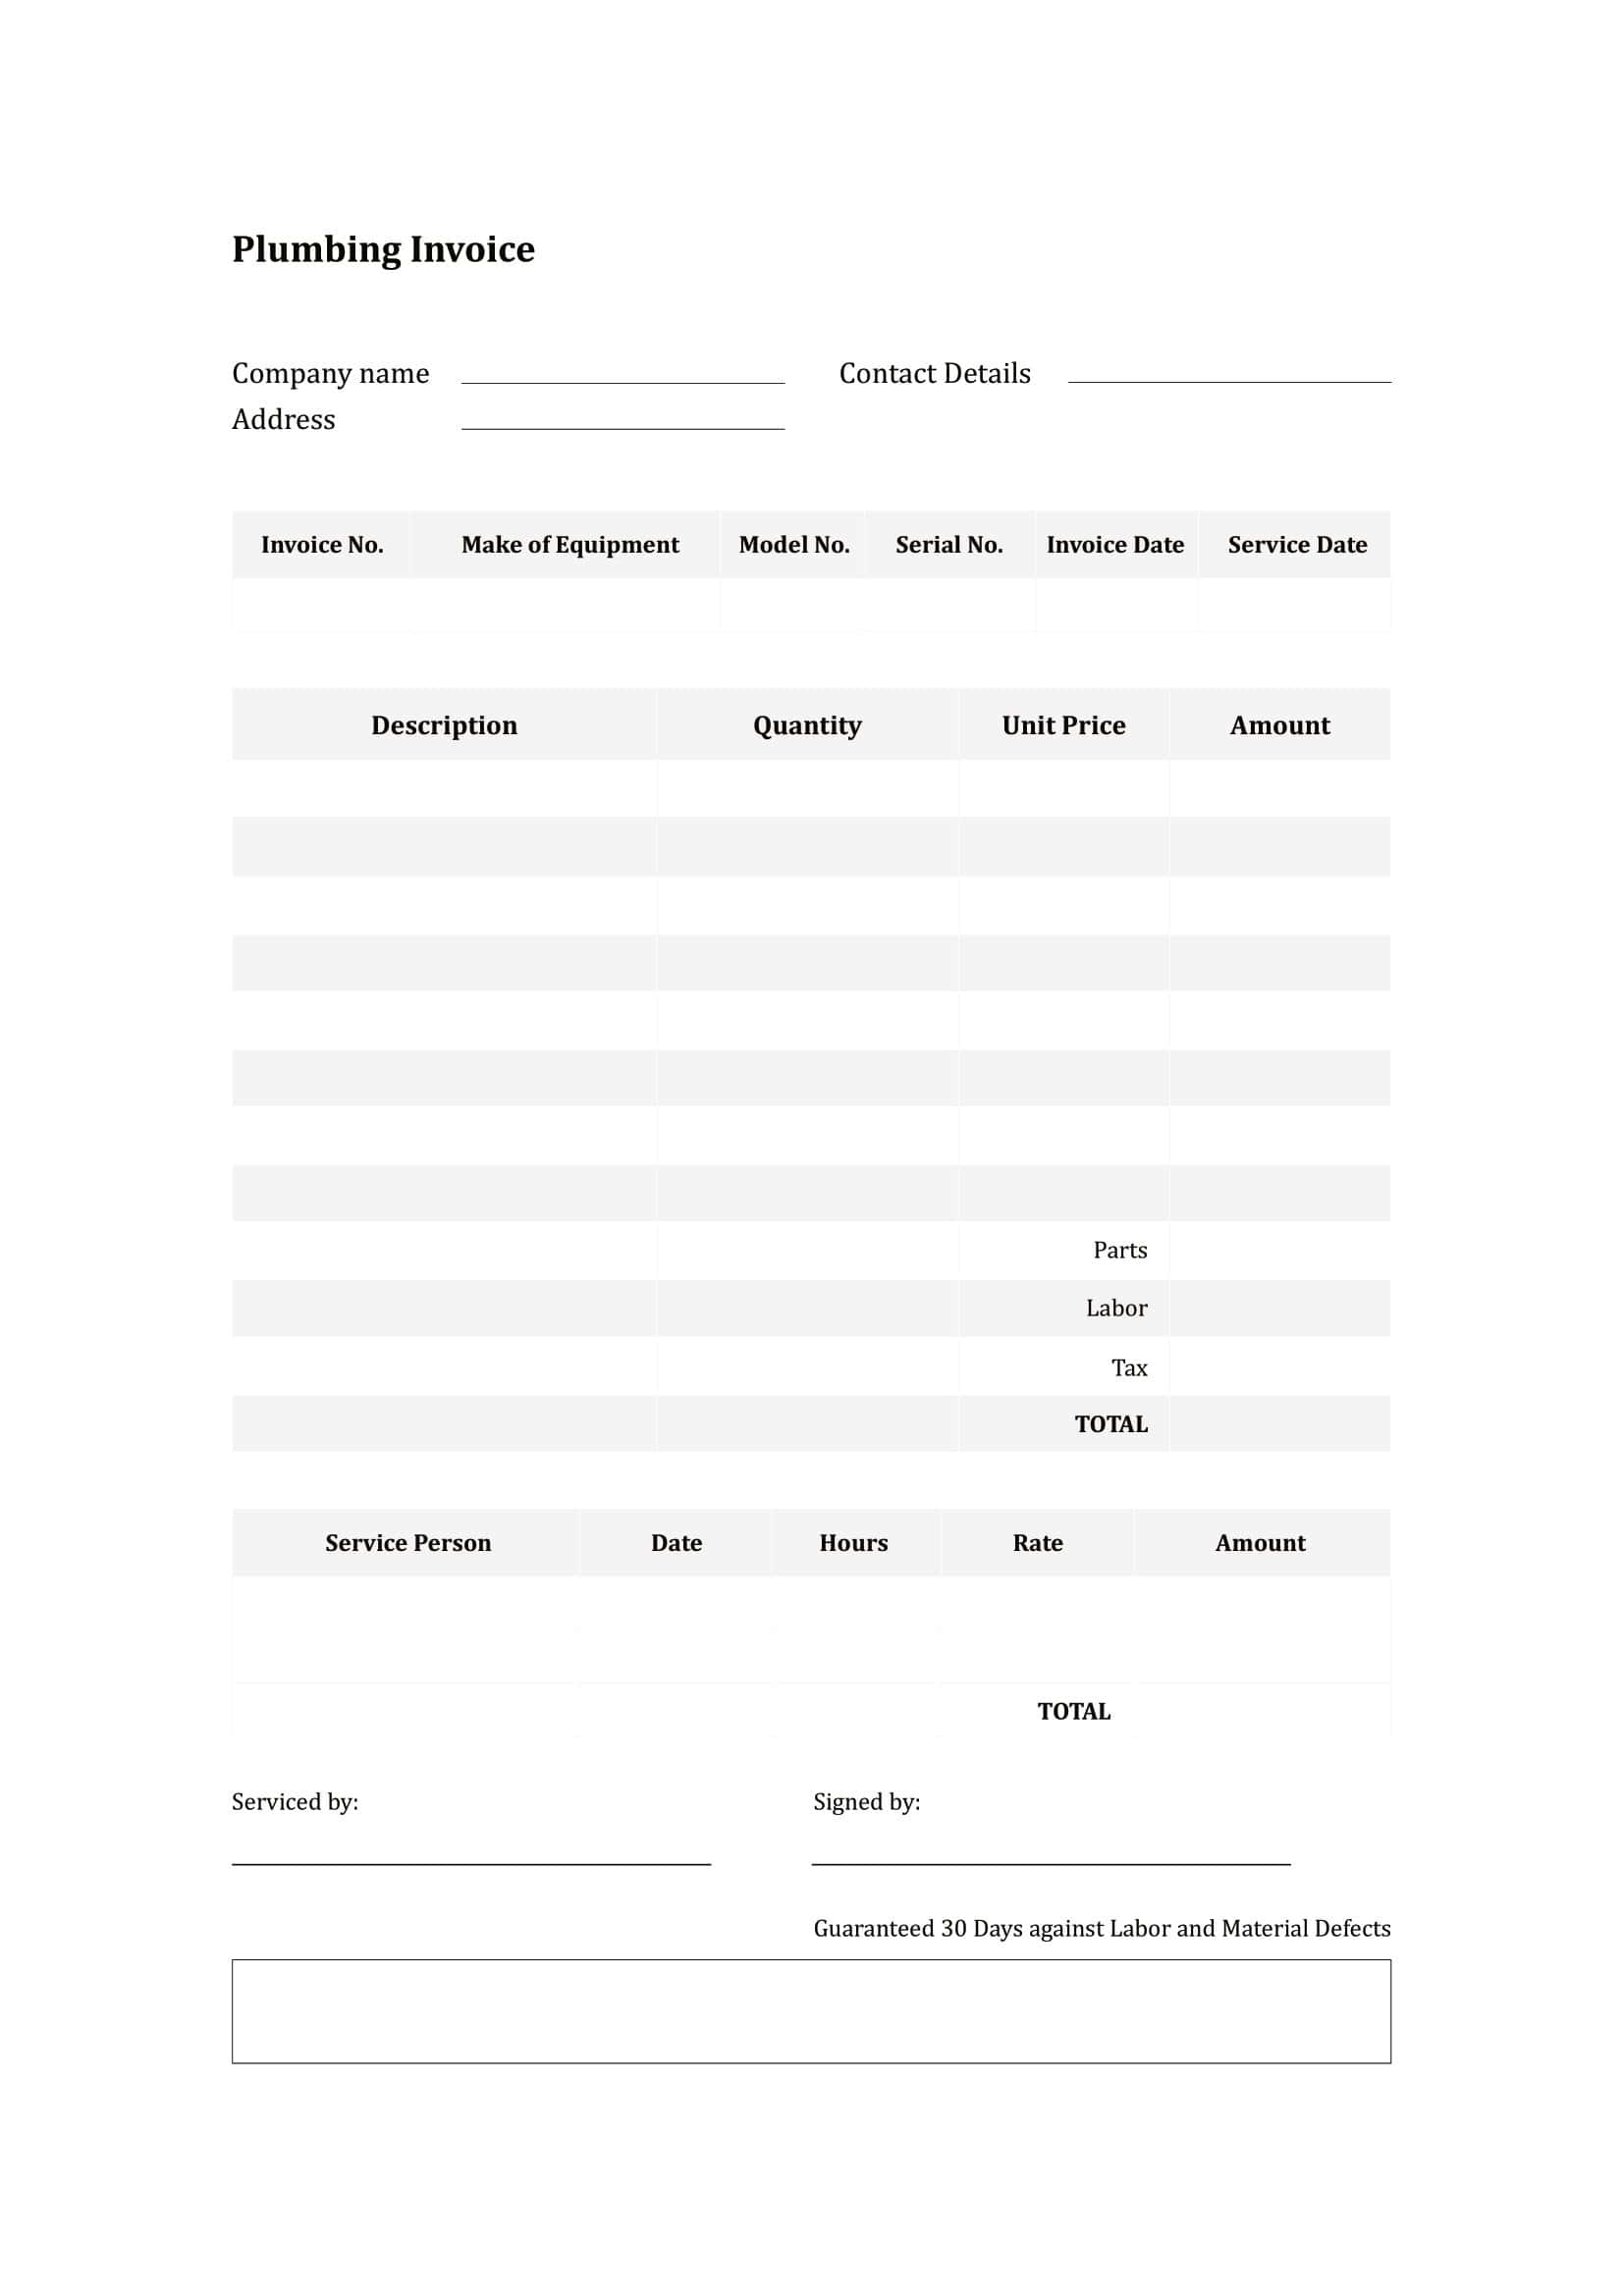
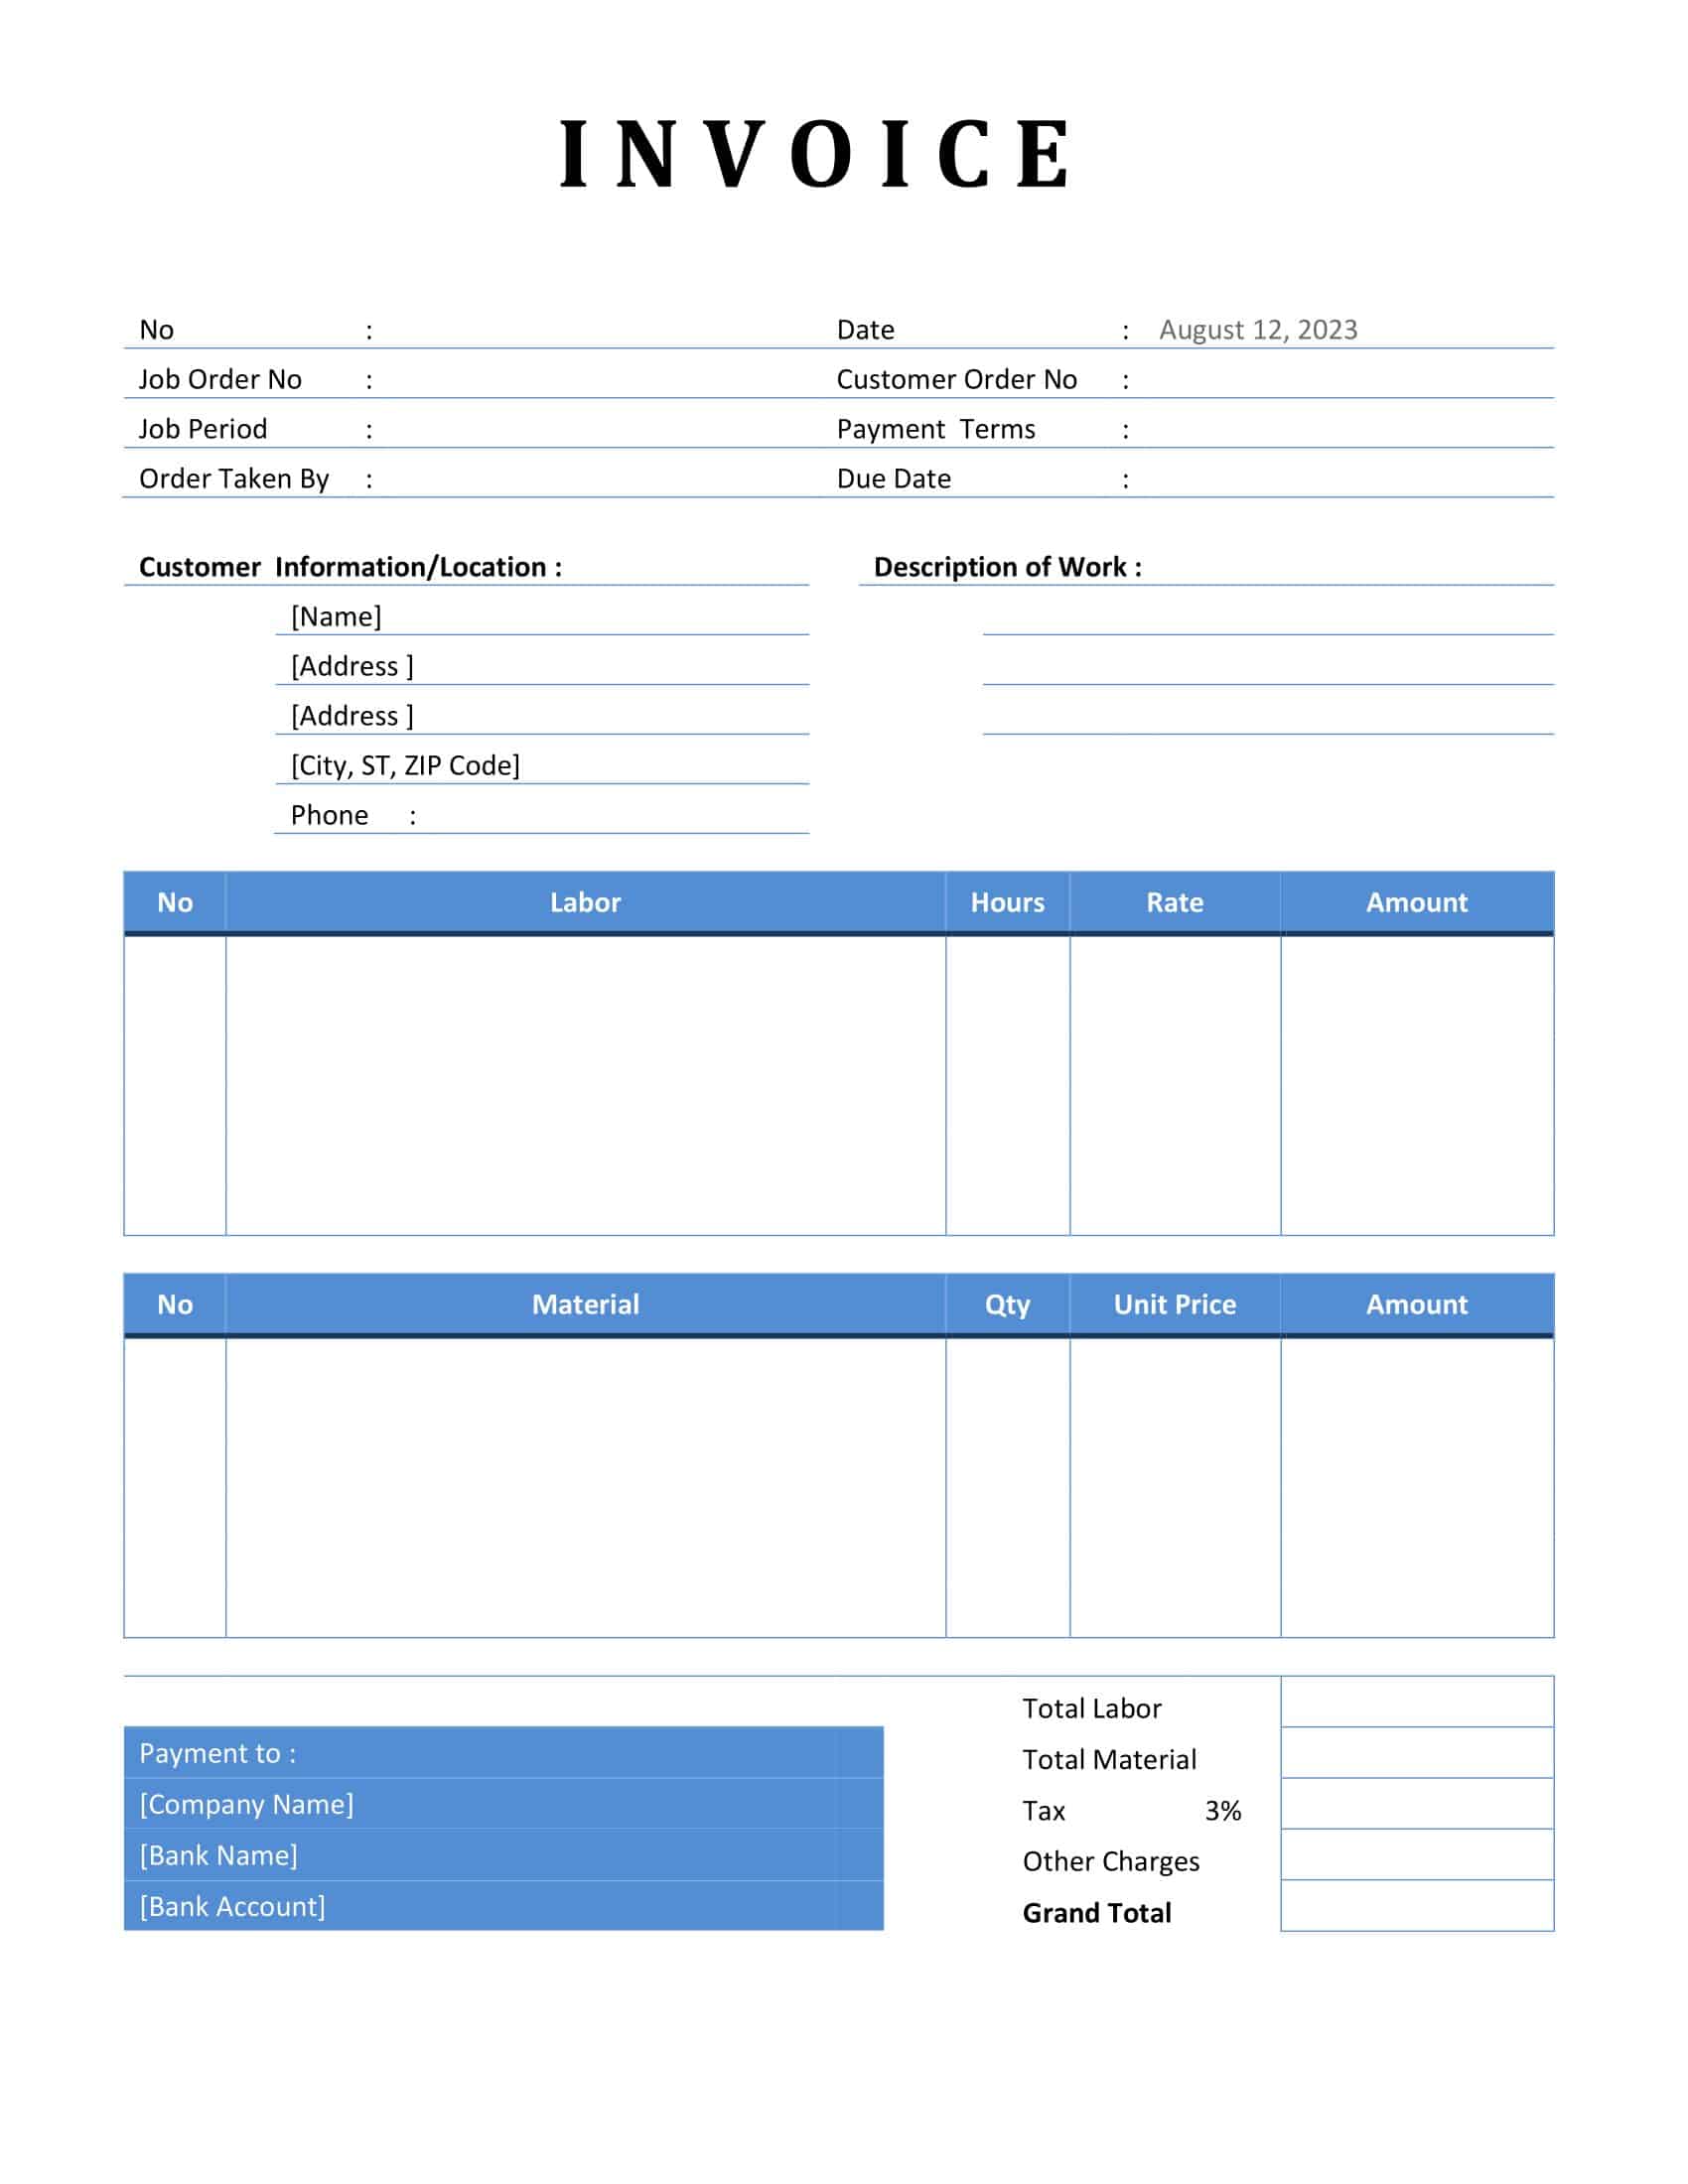
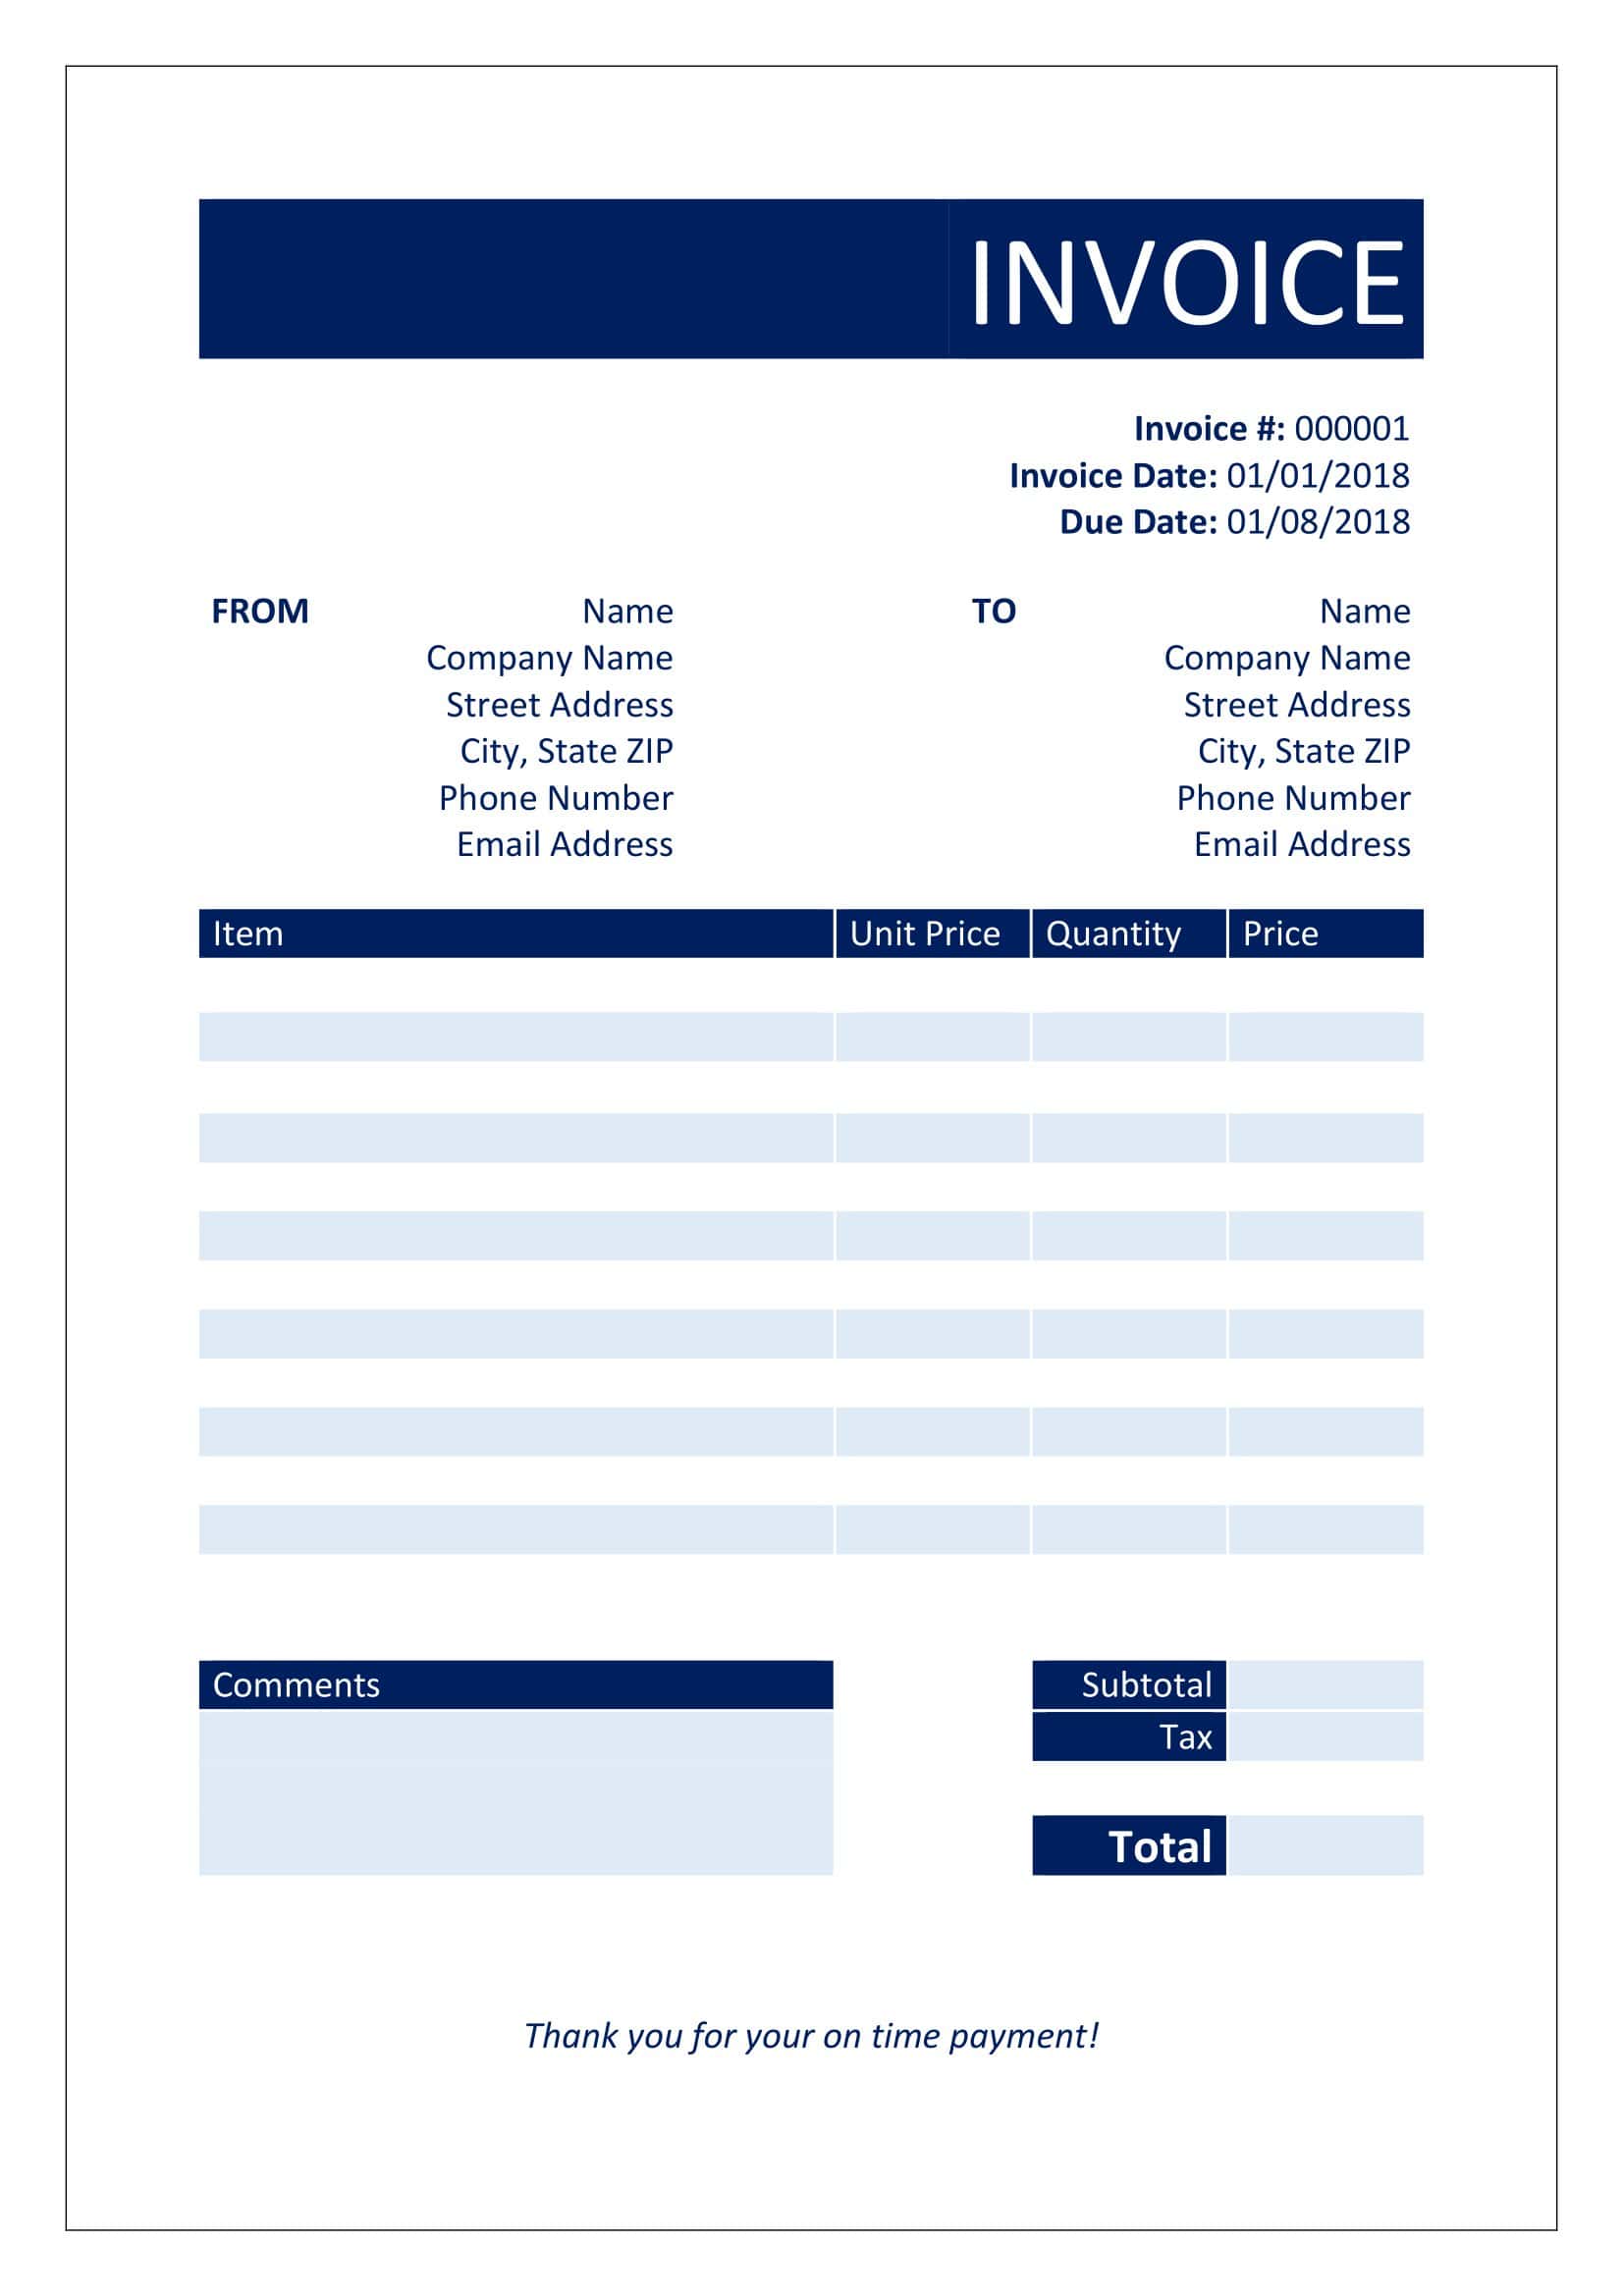
Plumbing Invoice Templates allow plumbing contractors to quickly generate professional billing statements for their customers. Having standardized Plumbing Invoice Templates available makes it easy to consistently bill clients for parts, labor, and plumbing services across all jobs. The templates save plumbers time while presenting polished invoices.
The Plumbing Invoice Templates consolidate all the required billing information like plumbing company identity, client details, itemized parts and labor lines, totals, taxes, payment terms and more in an organized format. Key fields can be linked to price lists and pre-filled for fast completion. Calculations are handled automatically to prevent mistakes. The consistent structure of Plumbing Invoice Templates makes billing clear for customers as well.
Plumbing Invoice Templates enable contractors to look professional, minimize errors, and get paid faster for their work. Well-designed templates allow customization for each client or job while maintaining uniform invoice presentation. Plumbing Invoice Templates help contractors avoid tedious billing paperwork and focus their efforts on servicing customers. With the templates, plumbers can efficiently generate accurate invoices to keep cash flowing into their business.
Why is it Essential for Plumbers to Issue Detailed Invoices?
When completing plumbing repairs or installations, issuing a comprehensive invoice is an essential but often overlooked step for plumbers. While eager to get paid and move on to the next job, taking the time to provide detailed, professional invoices benefits plumbers in multiple ways. Here are a few key reasons why it is essential for plumbers to issue detailed invoices:
- Clarity and Transparency: Firstly, a detailed invoice provides clarity and transparency to the customer. By itemizing services rendered and parts provided, the customer can clearly understand what they are being charged for. This transparency can help in establishing trust between the service provider and the client. When a customer can see a clear breakdown of costs, it minimizes the chances of confusion or disputes over perceived overcharges or unexpected fees.
- Professionalism: A comprehensive and structured invoice reflects professionalism. It demonstrates to clients that the plumber takes their business seriously and is committed to maintaining standards. Such practices can enhance the reputation of the plumber or the plumbing company, leading to higher client retention rates and recommendations.
- Financial Record Keeping: From an operational perspective, detailed invoicing is crucial for financial record-keeping. It helps plumbers or their accountants track revenue, manage expenses, and calculate taxes. This systematic approach ensures that the business remains compliant with financial regulations and aids in the timely detection of any discrepancies in accounts.
- Legal Protection: In some situations, disputes might arise between the plumber and the client, be it over the quality of work, the scope of services, or the cost. A detailed invoice serves as a legal document that can be used as evidence to validate claims. It provides a written record of agreed-upon prices, labor charges, parts used, and the services provided, potentially safeguarding the plumber against unjust accusations or litigations.
- Forecasting and Business Growth: Detailed invoicing also plays a role in business strategy. By consistently documenting services and parts in invoices, plumbers can analyze which services are more popular or which parts are frequently replaced. Such insights can guide inventory decisions, pricing strategies, and even marketing efforts, ultimately contributing to business growth and profitability.
What Should A Plumbing Invoice Include?
To be effective, clear, and professional, a plumbing invoice should be comprehensive and detailed. Here’s a guide on what it should include:
Header:
- Business Name & Logo: Your company’s official name and a clear, recognizable logo at the top.
- Business Contact Information: Address, phone number, email address, and website.
- Invoice Number: A unique invoice number for tracking and referencing. This is essential for bookkeeping and tracking payments.
- Date: The date the invoice was issued.
Client’s Information:
- Client’s Name: The name of the person or business you provided services for.
- Client’s Address: Their complete postal address.
- Client’s Phone Number & Email: Best contact details for the client.
Service Details:
- Description of Services Rendered: List each service you provided. E.g., “Repaired bathroom sink leak”, “Installed new kitchen faucet”, etc.
- Date of Service: When you performed the service.
- Hours Worked: If you charge by the hour, specify the number of hours spent on the job.
- Rate: Your hourly rate or the fixed price for a particular service.
- Total for Each Service: Multiply the hours worked by your rate or provide the fixed price.
Parts and Materials:
- Description: Detailed description of parts or materials used. E.g., “3/4-inch copper pipe”, “Kitchen faucet unit”, etc.
- Quantity: How many or how much of each item was used.
- Cost Per Unit: The cost for each individual item or material.
- Total Cost for Each Material: Multiply the quantity by the cost per unit.
Additional Costs:
- Travel Expenses: If you charge for travel, indicate the cost.
- Emergency Service Charges: If the service was an emergency call-out, list any extra fees.
- Discounts: If you provided a discount, list it with a brief description.
Total Amount Due:
- Subtotal: This is the total before any taxes, discounts, or additional charges.
- Taxes: Include any sales tax or VAT that applies.
- Grand Total: The complete total the client owes you (Subtotal + Taxes – Discounts).
Payment Details:
- Payment Due Date: Clearly indicate by when the payment should be made.
- Accepted Payment Methods: List the ways clients can pay, such as check, credit card, bank transfer, or online payment gateways like PayPal.
- Late Fee Information: If you charge a late fee, include details about the amount and when it will be applied.
Additional Notes:
- Warranty or Guarantee Information: If you offer any warranties on your work or parts used, specify the terms.
- Additional Comments: Any other relevant information about the job or the terms of service.
Footer:
- Thank You Note: A brief thank you for the business can go a long way in maintaining good client relations.
- Business or License Number: If you’re required to have a license number for your plumbing work, include it here.
Professional Presentation:
- Clear Layout: Use a clean, organized layout that makes the invoice easy to read.
- Consistent Branding: Use the same colors, fonts, and style as your other business documents to present a cohesive brand image.
How to Make a Plumbing Invoice ?
Creating a plumbing invoice involves providing a detailed and structured breakdown of services rendered and parts provided. Here’s a step-by-step guide to help you make a plumbing invoice:
Step 1: Use the Right Platform or Template
- Option A: Purchase invoicing software tailored for trades or general business use. These often come with customizable templates for different industries, including plumbing.
- Option B: Use a word processor or spreadsheet program (like Microsoft Word or Excel). There are free invoice templates available online that you can customize for plumbing services.
Step 2: Include Business Information
- At the top of the invoice, list your plumbing business’s name, address, phone number, email address, and any other relevant contact details.
- If you have a business logo, consider adding it to give the invoice a professional appearance.
Step 3: Add Client Information
- Below your business information, include a section for the client’s name, address, phone number, and email address.
Step 4: Invoice Details
- Assign an invoice number. This is crucial for tracking and record-keeping. Ensure each invoice has a unique number.
- Specify the invoice date and the due date for payment.
Step 5: List Services Rendered and Parts Provided
- Create a table with columns for the service/part description, quantity, unit price, and total price.
- Clearly describe each service rendered, e.g., “Pipe Leak Repair”, “Water Heater Installation”, etc.
- List out any parts or materials used, e.g., “PVC pipe – 2 meters”, “New Faucet Handle”, etc.
- For each service or part, provide the unit price and calculate the total cost based on quantity.
Step 6: Calculate the Total Amount
- At the bottom of the service and parts table, calculate the subtotal.
- If applicable, add any taxes, service charges, or discounts.
- Clearly mark the final amount due, ensuring it stands out.
Step 7: Specify Payment Terms
- Clearly indicate accepted payment methods, e.g., cash, check, credit card, bank transfer, etc.
- Specify any late payment penalties or terms to encourage timely payment.
Step 8: Add Additional Notes or Recommendations
- If there are any after-care instructions, warranties, or additional notes relevant to the service provided, include them in a separate section.
- You can also use this section to recommend future services or maintenance checks, acting as a gentle reminder and potential business opportunity.
Step 9: Include a Thank You Note
- A brief thank you note at the end can help build a rapport with the client. It can be as simple as, “Thank you for choosing [Your Business Name]. We appreciate your business!”
Step 10: Review and Send
- Always review the invoice for any mistakes in calculations, spelling, or other details.
- Once confirmed, send the invoice to the client. This can be done physically (printed copy) or digitally via email, depending on the client’s preference or your standard business practice.
Step 11: Track and Follow-Up
- Keep a record of all sent invoices. Monitor them for timely payments and send reminders to clients as the due date approaches.
- Use the invoice number for tracking and referencing in any further communications.
Effective Billing Strategies for Plumbing Businesses
Proper invoicing is a vital aspect of maintaining a healthy cash flow, building trust with clients, and ensuring the administrative aspect of your plumbing business runs smoothly. Here’s a detailed guide with invoicing tips specifically tailored for a plumbing company:
Leverage Digital Invoicing Solutions:
- Automate the Process: Using digital invoicing software can help you automate recurring invoices, send reminders to clients, and track outstanding payments.
- Cloud-based Solutions: Cloud solutions allow you to access invoices from any device, anywhere. This is especially useful for plumbing businesses that might be handling admin tasks on the go.
Be Clear and Precise:
- Itemization: List every service and part separately. The clearer your invoice, the fewer questions or disputes you’ll have from clients.
- Avoid Technical Jargon: While certain terms may be commonplace for you, your client might not understand them. Where possible, simplify or provide a brief explanation.
Set Clear Payment Terms:
- Due Date: Always mention the due date prominently. Typical terms might be “Net 30” (meaning payment is due within 30 days), but choose what works best for your business.
- Late Fees: If you impose fees for late payments, make this clear on the invoice.
Provide Multiple Payment Options:
- Offering multiple payment methods, such as checks, credit cards, bank transfers, or digital wallets, can make it easier for clients to settle their bills and ensure you get paid faster.
Maintain Consistency:
- Keeping a consistent format for all your invoices makes it easier for regular clients to understand and process your bills. It also streamlines your own record-keeping process.
Personalize Your Invoices:
- Including a personalized note or directly addressing the client can build rapport. A simple “Thank you for your business, [Client’s Name]” can go a long way.
Keep Records:
- It’s essential to keep copies of all invoices for accounting, tax, and legal purposes. Digital solutions often have built-in archiving features, but if you’re using paper invoices, ensure they’re filed systematically.
Promptly Address Queries:
- Sometimes, clients might have questions about the charges on their invoice. Address these questions promptly and professionally. It not only fosters trust but also increases the likelihood of timely payments.
Offer Discounts for Early or On-the-Spot Payments:
- As an incentive for prompt payment, consider offering a small discount for clients who pay immediately or well before the due date.
Establish a Follow-Up Routine:
- Set up a systematic process for following up on outstanding payments. Sending a gentle reminder a week before the due date, on the due date, and a week after can increase your chances of getting paid.
Maintain Professionalism:
- Even if you have a long-standing, informal relationship with a client, always maintain professionalism in your invoices. This includes using official company letterheads, ensuring correct grammar and spelling, and avoiding colloquial language.
Include Warranty or Guarantee Information:
- If certain services or parts come with a warranty, clearly state this on the invoice. It can act as a reference for clients and reduces the chance of disputes later on.
Stay Updated on Tax Regulations:
- Tax rates and regulations can change. Regularly update your invoicing methods to reflect current tax rates, especially if you’re required to collect sales tax on parts or services.
Secure Digital Data:
- If using digital invoicing, ensure that your software is secure, regularly updated, and backed up. This protects sensitive client information and your business data from potential breaches.
Be Open to Feedback:
- Ask regular clients for feedback on your invoicing process. They might offer valuable insights that can help streamline the process for both parties.
When to Send a Plumbing Receipt
- Immediately after service completion: This is the most common practice. Once the plumbing job is done and the final amount has been determined, the plumber should provide a receipt.
- After payment is received: If the client pays upfront, you can send the receipt afterward as a confirmation of payment.
- On request: Sometimes, the client might not require a receipt immediately but may ask for it later for record-keeping or warranty purposes.
- Periodically: If you have an ongoing contract with a client, you might send monthly receipts or invoices for the services rendered during that period.
How to Send a Plumbing Receipt
- In-Person:
- Printed Receipt: Utilize a printed receipt book where you can handwrite details and provide a copy to the client.
- Digital Receipt: Use a tablet or mobile device to create a digital receipt and print it using a portable printer.
- Electronic Methods:
- Email: Most modern businesses prefer sending receipts via email. It’s quick, efficient, and ensures the client receives a copy for their records.
- SMS: Some software solutions allow for receipt delivery via SMS, which includes a link to a digital receipt.
- Mobile Apps: Apps like Square or QuickBooks have functionalities to send digital receipts.
- Traditional Mail:
- For clients who prefer a physical copy and did not get one in-person, or for more formal business arrangements, mailing a printed receipt might be appropriate.
- Fax:
- Though less common nowadays, some businesses still use fax machines for document transmission.
Plumbing Invoice Template
XYZ Plumbing Services
123 Main St, Anytown, 12345
(123) 456-7890 | xyzplumbing@email.com
Invoice To:
[Client’s Name]
[Client’s Address]
Invoice Details:
Invoice Number: [Invoice Number]
Date: [Date]
| Description | Quantity | Unit Price | Total |
| Labor (hours worked) | [Hours] | [Hourly Rate] | [Labor Cost] |
| [Material Description] | [Quantity] | [Unit Price] | [Total Price] |
Subtotal: [Subtotal]
Tax (X%): [Tax Amount]
Total Amount: [Grand Total]
Client’s Signature:
FAQs
Can I offer a guarantee on my plumbing services?
Yes, many plumbers offer guarantees or warranties on their work to build trust with clients and ensure satisfaction. If you offer such a guarantee, include the terms and duration on the invoice.
How long should I keep copies of my plumbing invoices?
It’s advisable to keep copies of your plumbing invoices for at least 7 years. This helps in case of any disputes, for tax purposes, or to track the history of work done for a particular client.
What should I do if a client doesn’t pay the invoice on time?
First, send a polite reminder. If the client still doesn’t pay, you might consider additional reminders, charging late fees (if stated in your terms), or seeking legal advice for prolonged non-payment situations.
How detailed should my plumbing invoice be?
The more detailed, the better. It’s essential to provide clear descriptions of all services and materials to avoid confusion or disputes later on.
How do I calculate the total for my plumbing services?
To calculate the total:
- Sum up the cost of all materials used.
- Multiply the hours worked by the hourly rate to get the labor cost.
- Add any additional fees or charges.
- Calculate and add taxes if applicable.
- Combine all these amounts to get the total amount due.











![Free Printable Food Diary Templates [Word, Excel, PDF] 2 Food Diary](https://www.typecalendar.com/wp-content/uploads/2023/05/Food-Diary-1-150x150.jpg 150w, https://www.typecalendar.com/wp-content/uploads/2023/05/Food-Diary-1-1200x1200.jpg 1200w)
![Free Printable Credit Card Authorization Form Templates [PDF, Word, Excel] 3 Credit Card Authorization Form](https://www.typecalendar.com/wp-content/uploads/2023/06/Credit-Card-Authorization-Form-150x150.jpg)
![Free Printable Stock Ledger Templates [Excel,PDF, Word] 4 Stock Ledger](https://www.typecalendar.com/wp-content/uploads/2023/08/Stock-Ledger-150x150.jpg)
