Installing a new fence is a major project requiring careful planning and accurate cost estimates. Fence contractors must provide clients detailed quotes accounting for all aspects of the job from materials to labor to meet expectations. Creating professional estimates from scratch takes knowledge and time. This article provides downloadable fence estimate templates to simplify the process for contractors.
Our fillable PDF forms include all necessary line items and common fence types to generate customized estimates efficiently. Sections for materials, services, fees, and signature fields organize the key details clients need to make informed decisions.
Whether a simple wire fence or ornate wood privacy fence, these templates allow contractors to produce polished estimates that protect their time and profits while impressing customers. Use them as a sales tool and reference with clear scope and pricing. Read on for tips on creating competitive yet profitable fence installation estimates.
Table of Contents
Fence Estimate Templates
A fence estimate is a document that outlines the costs to build or repair a fence. It provides specifications and pricing to inform fencing project decisions. A fence estimate template structures this quote format.
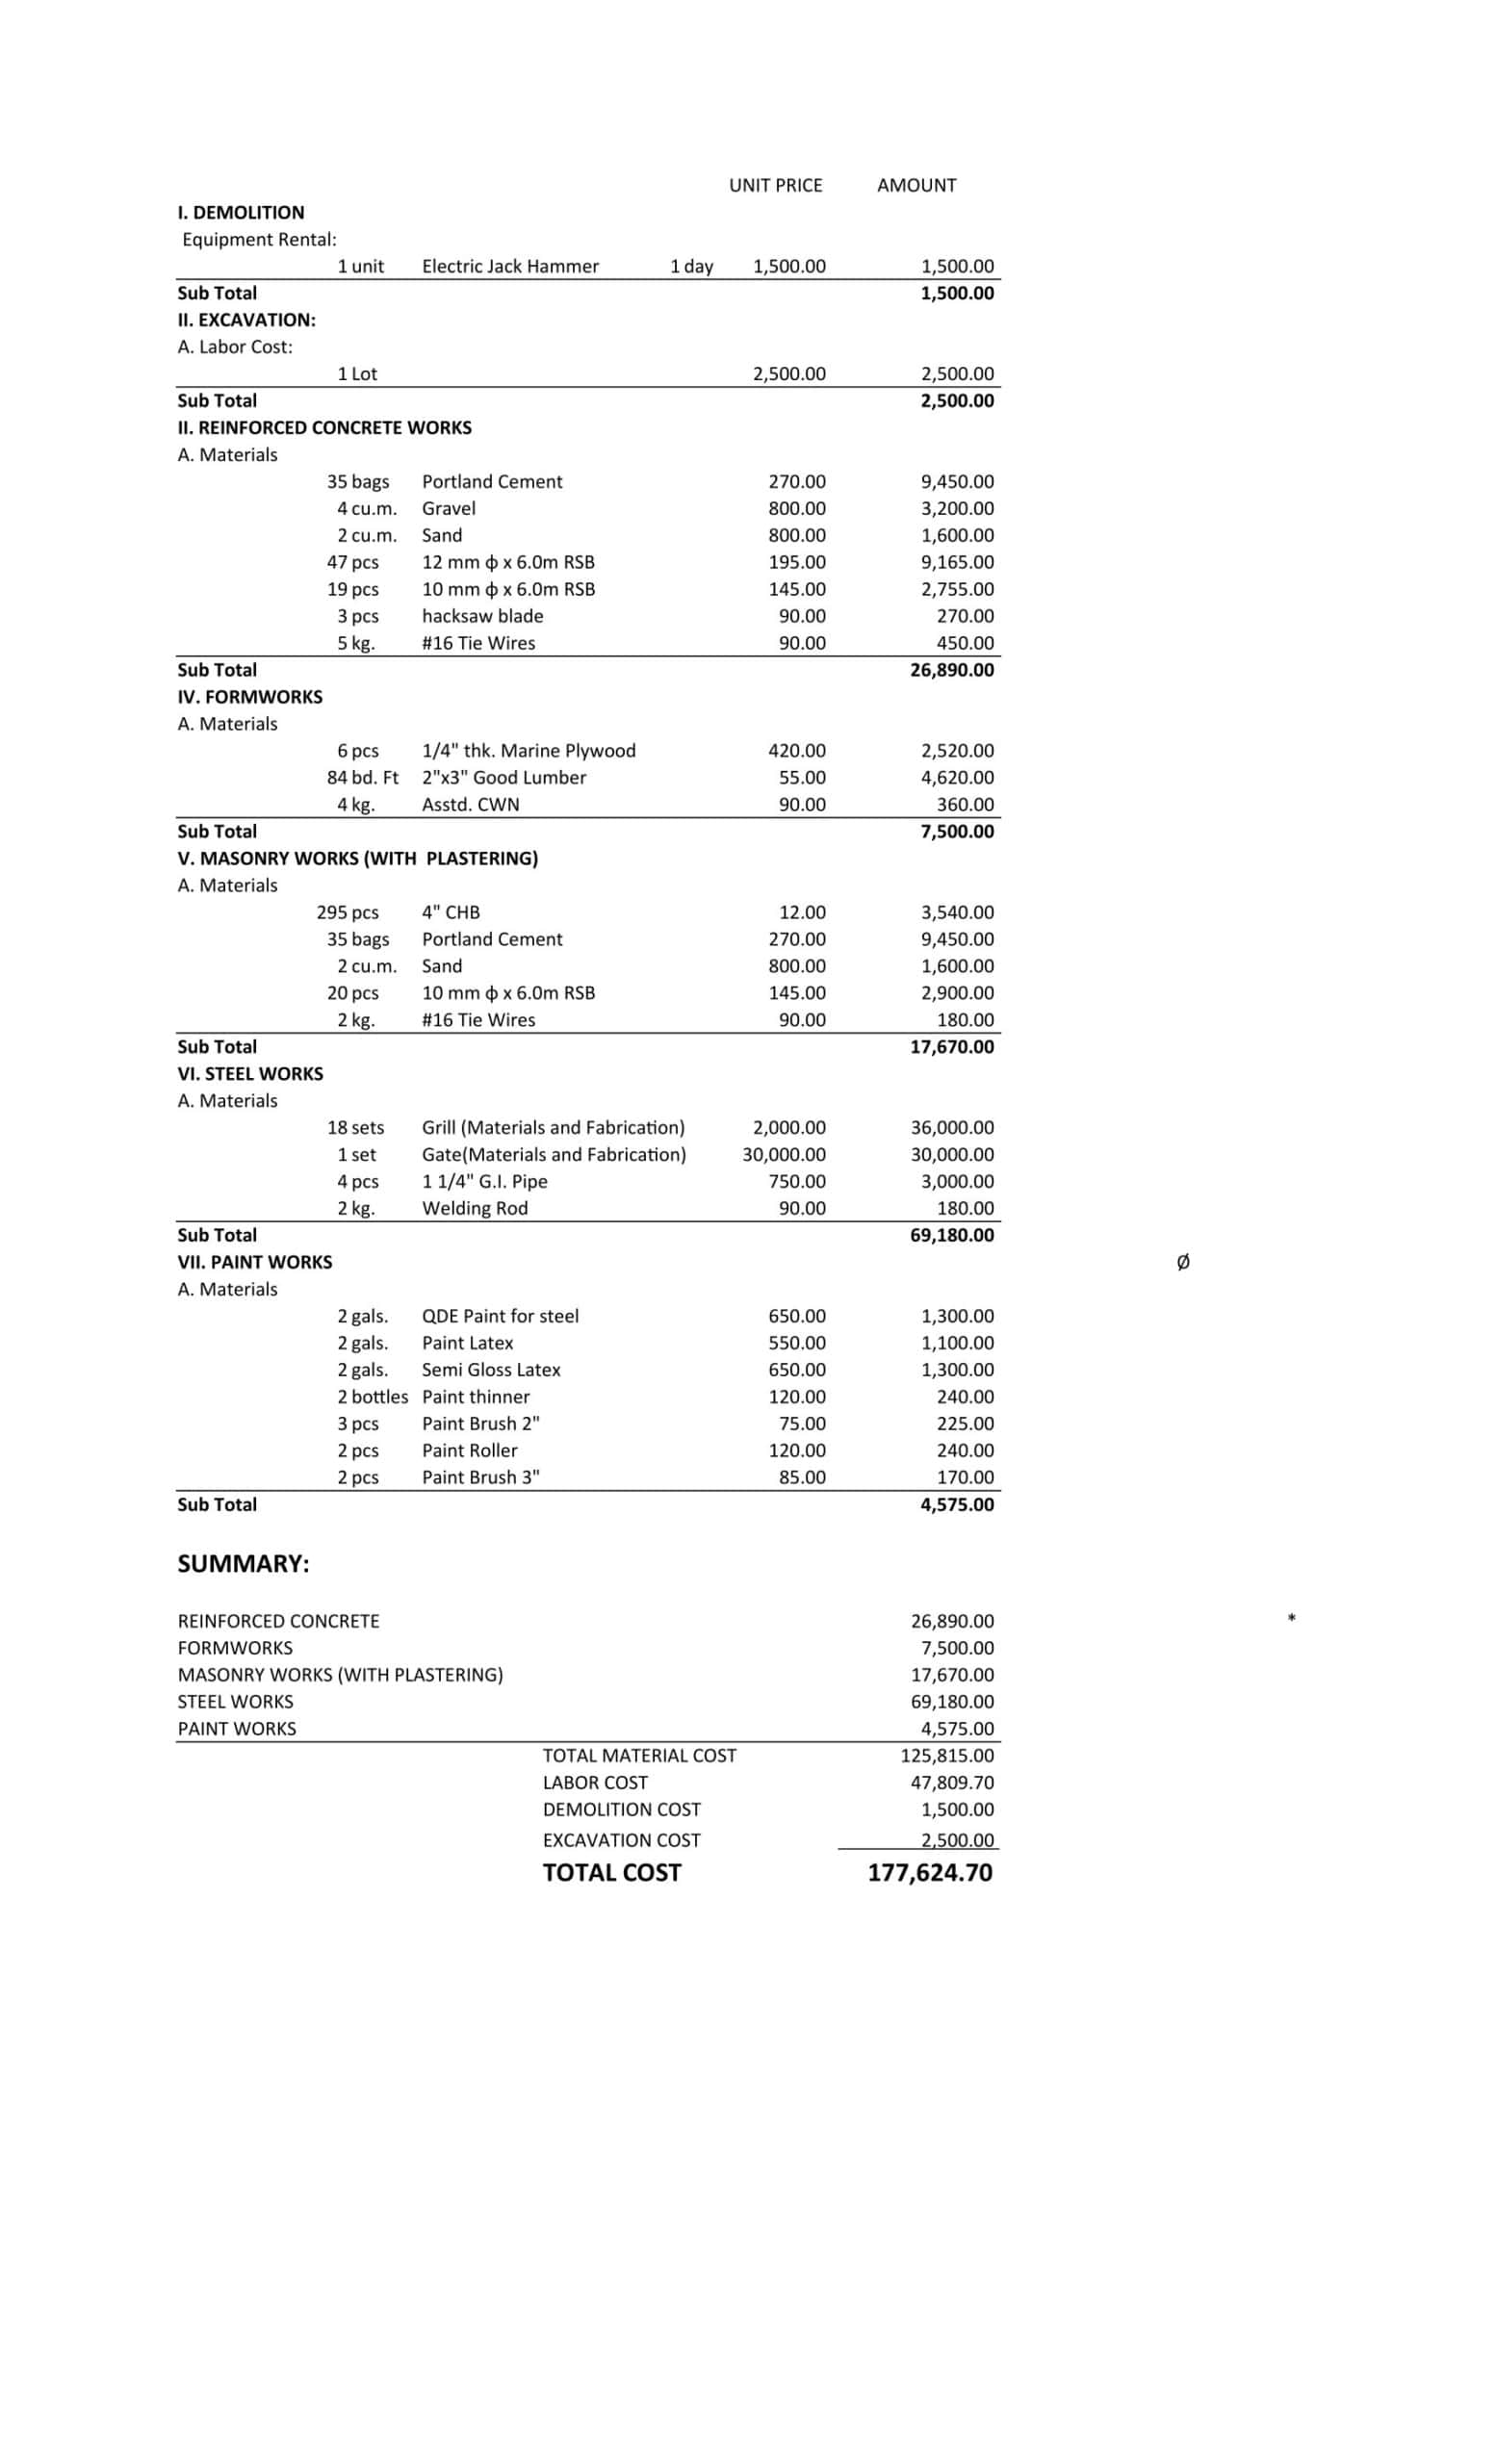
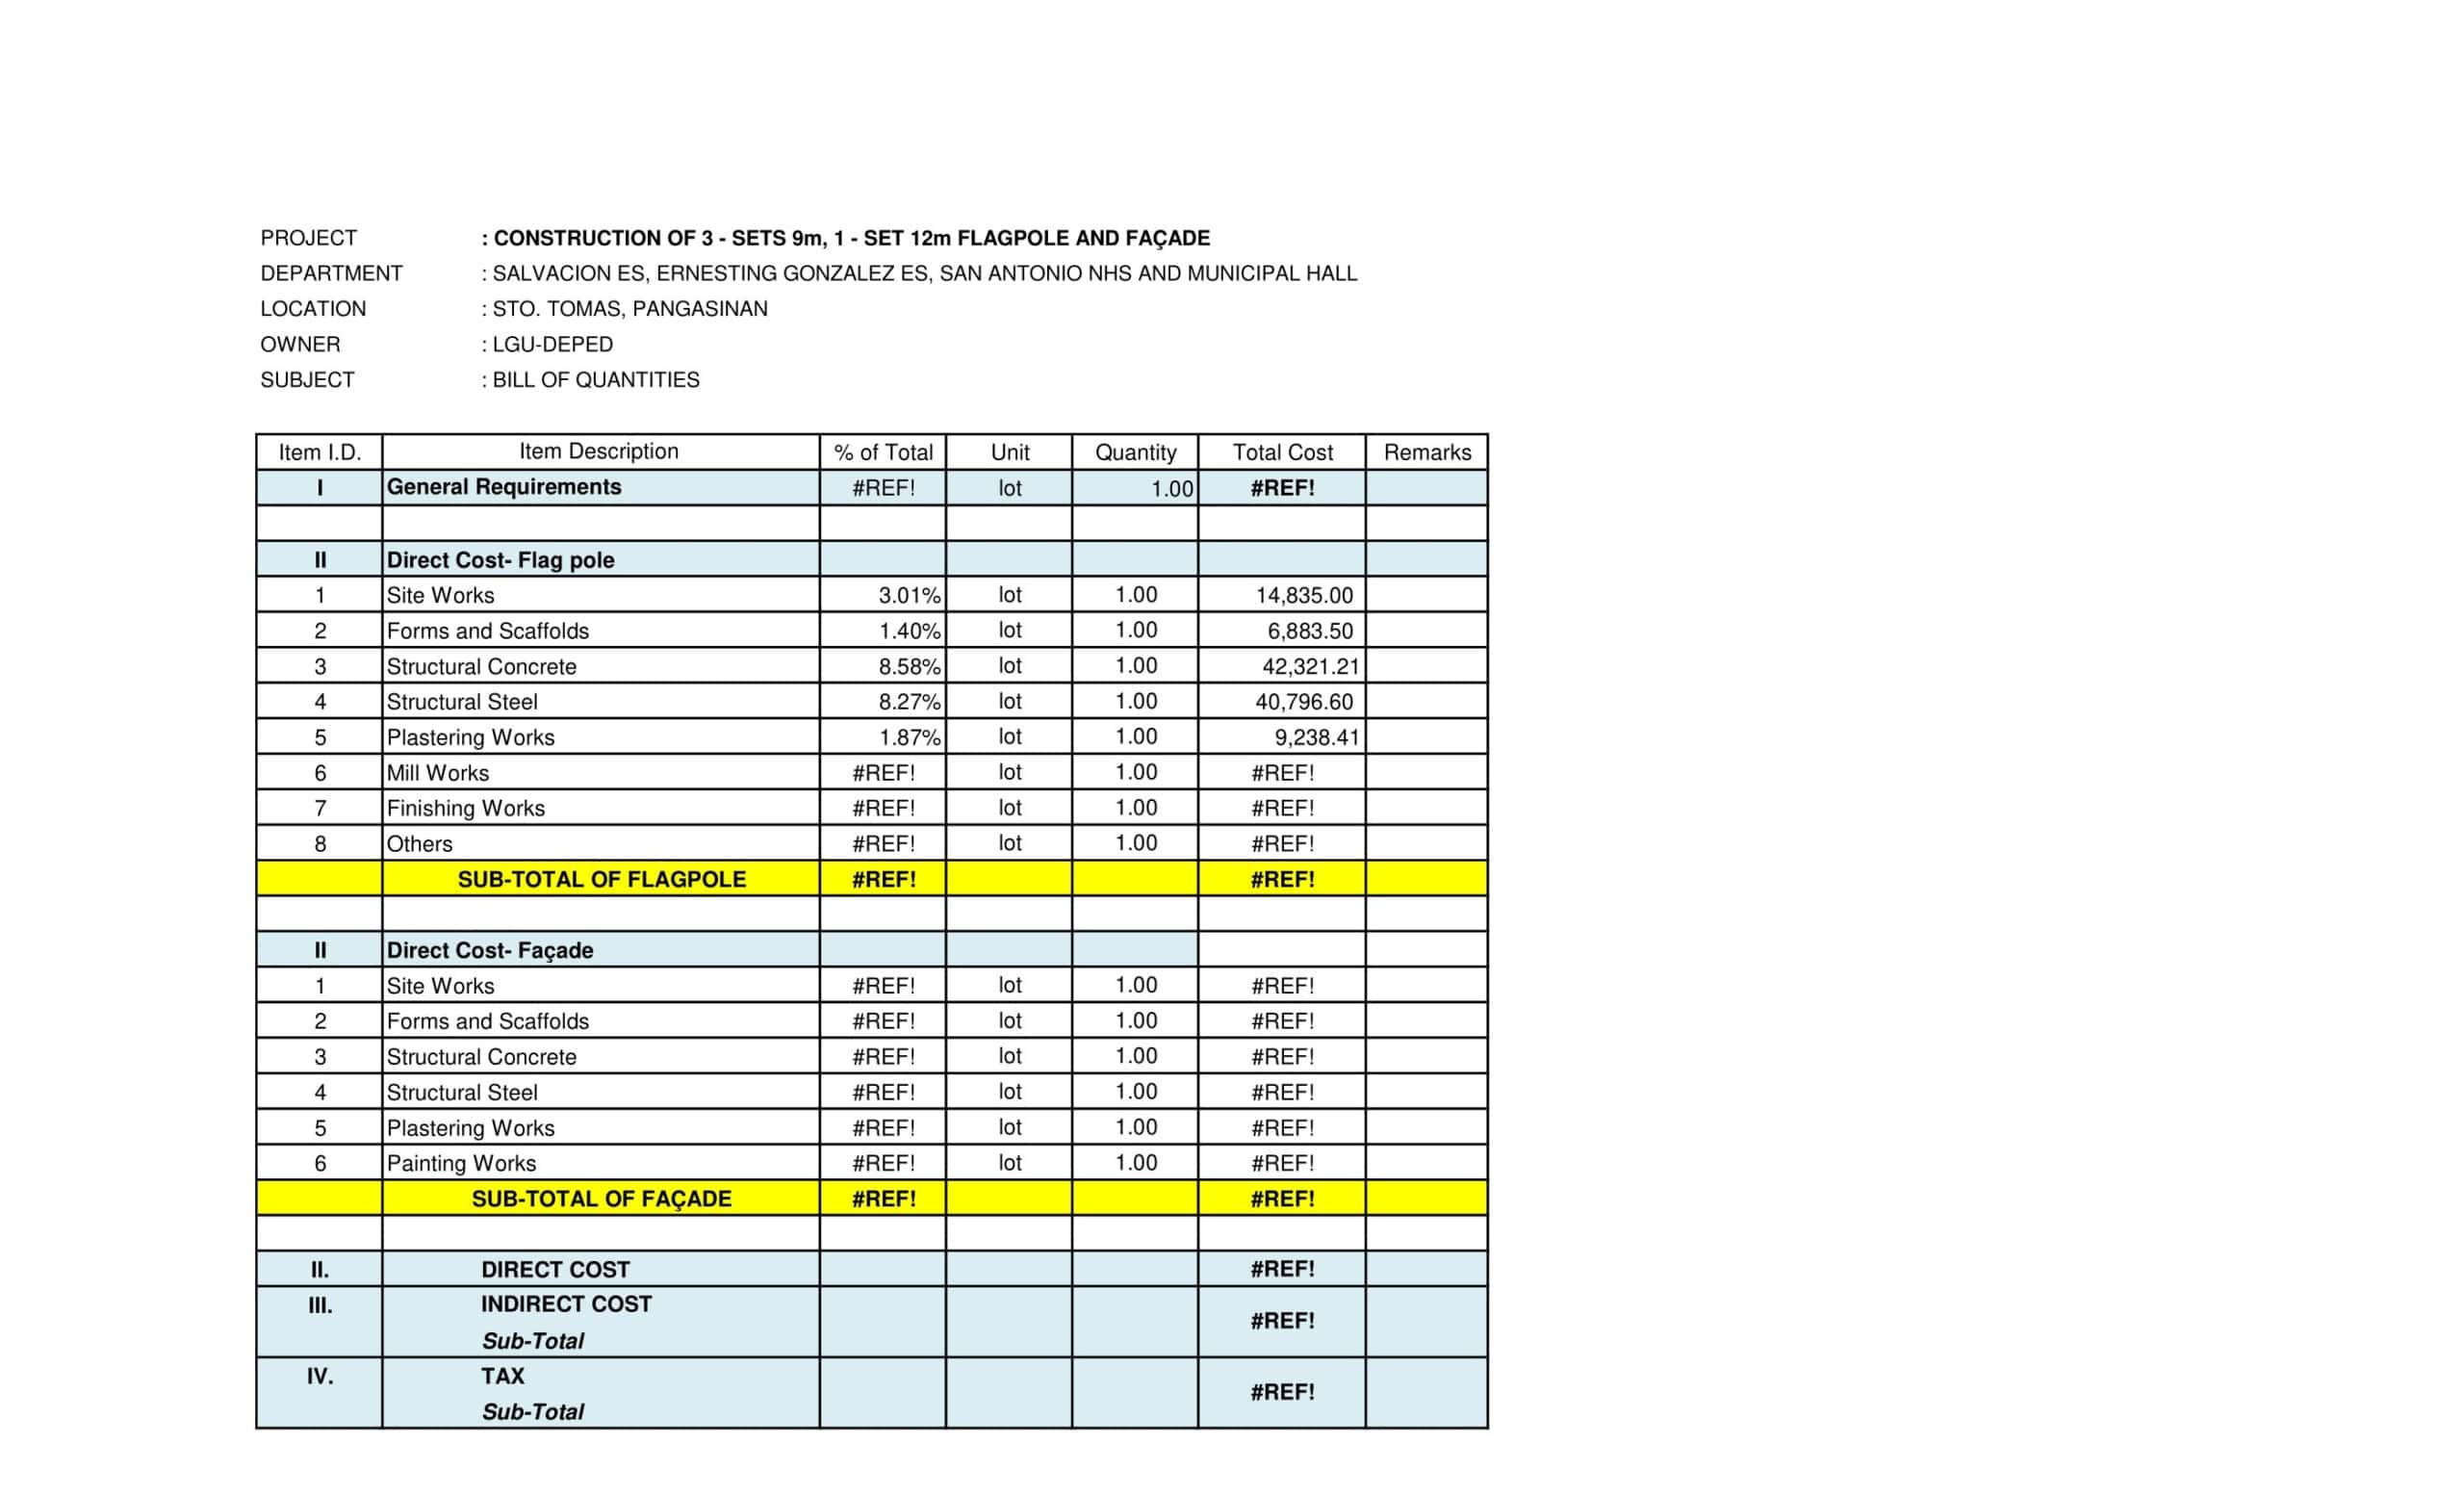
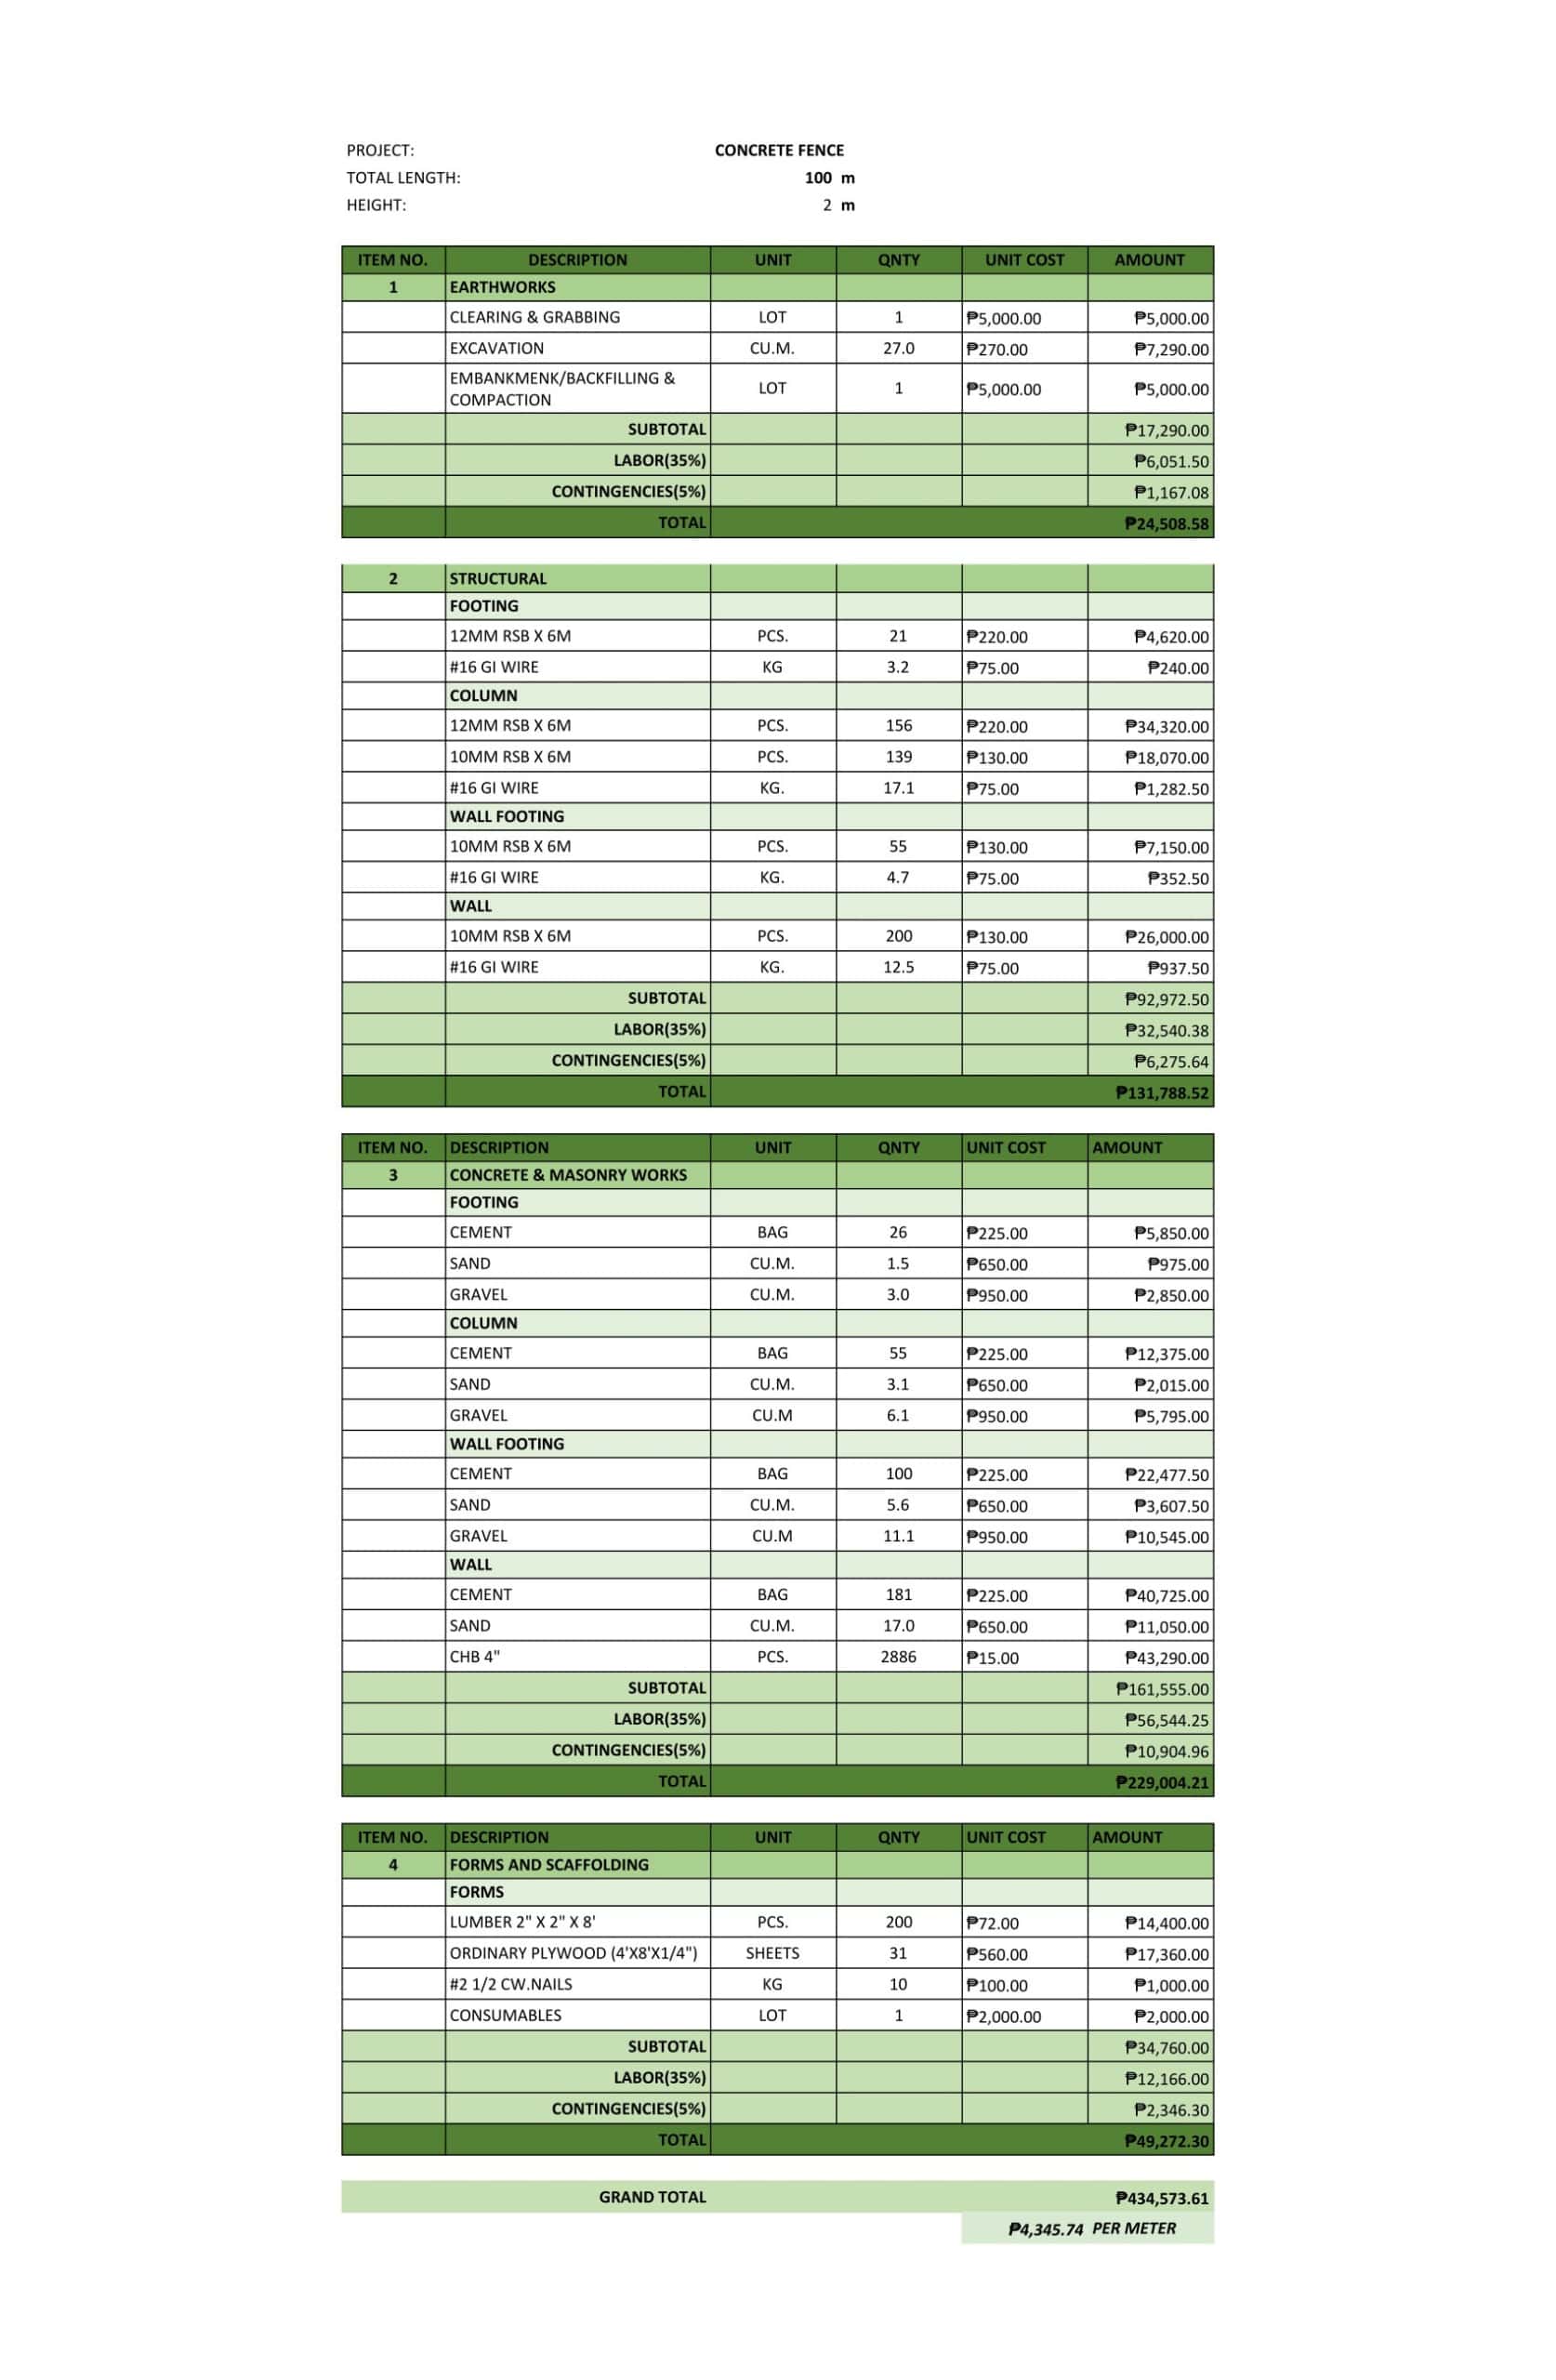
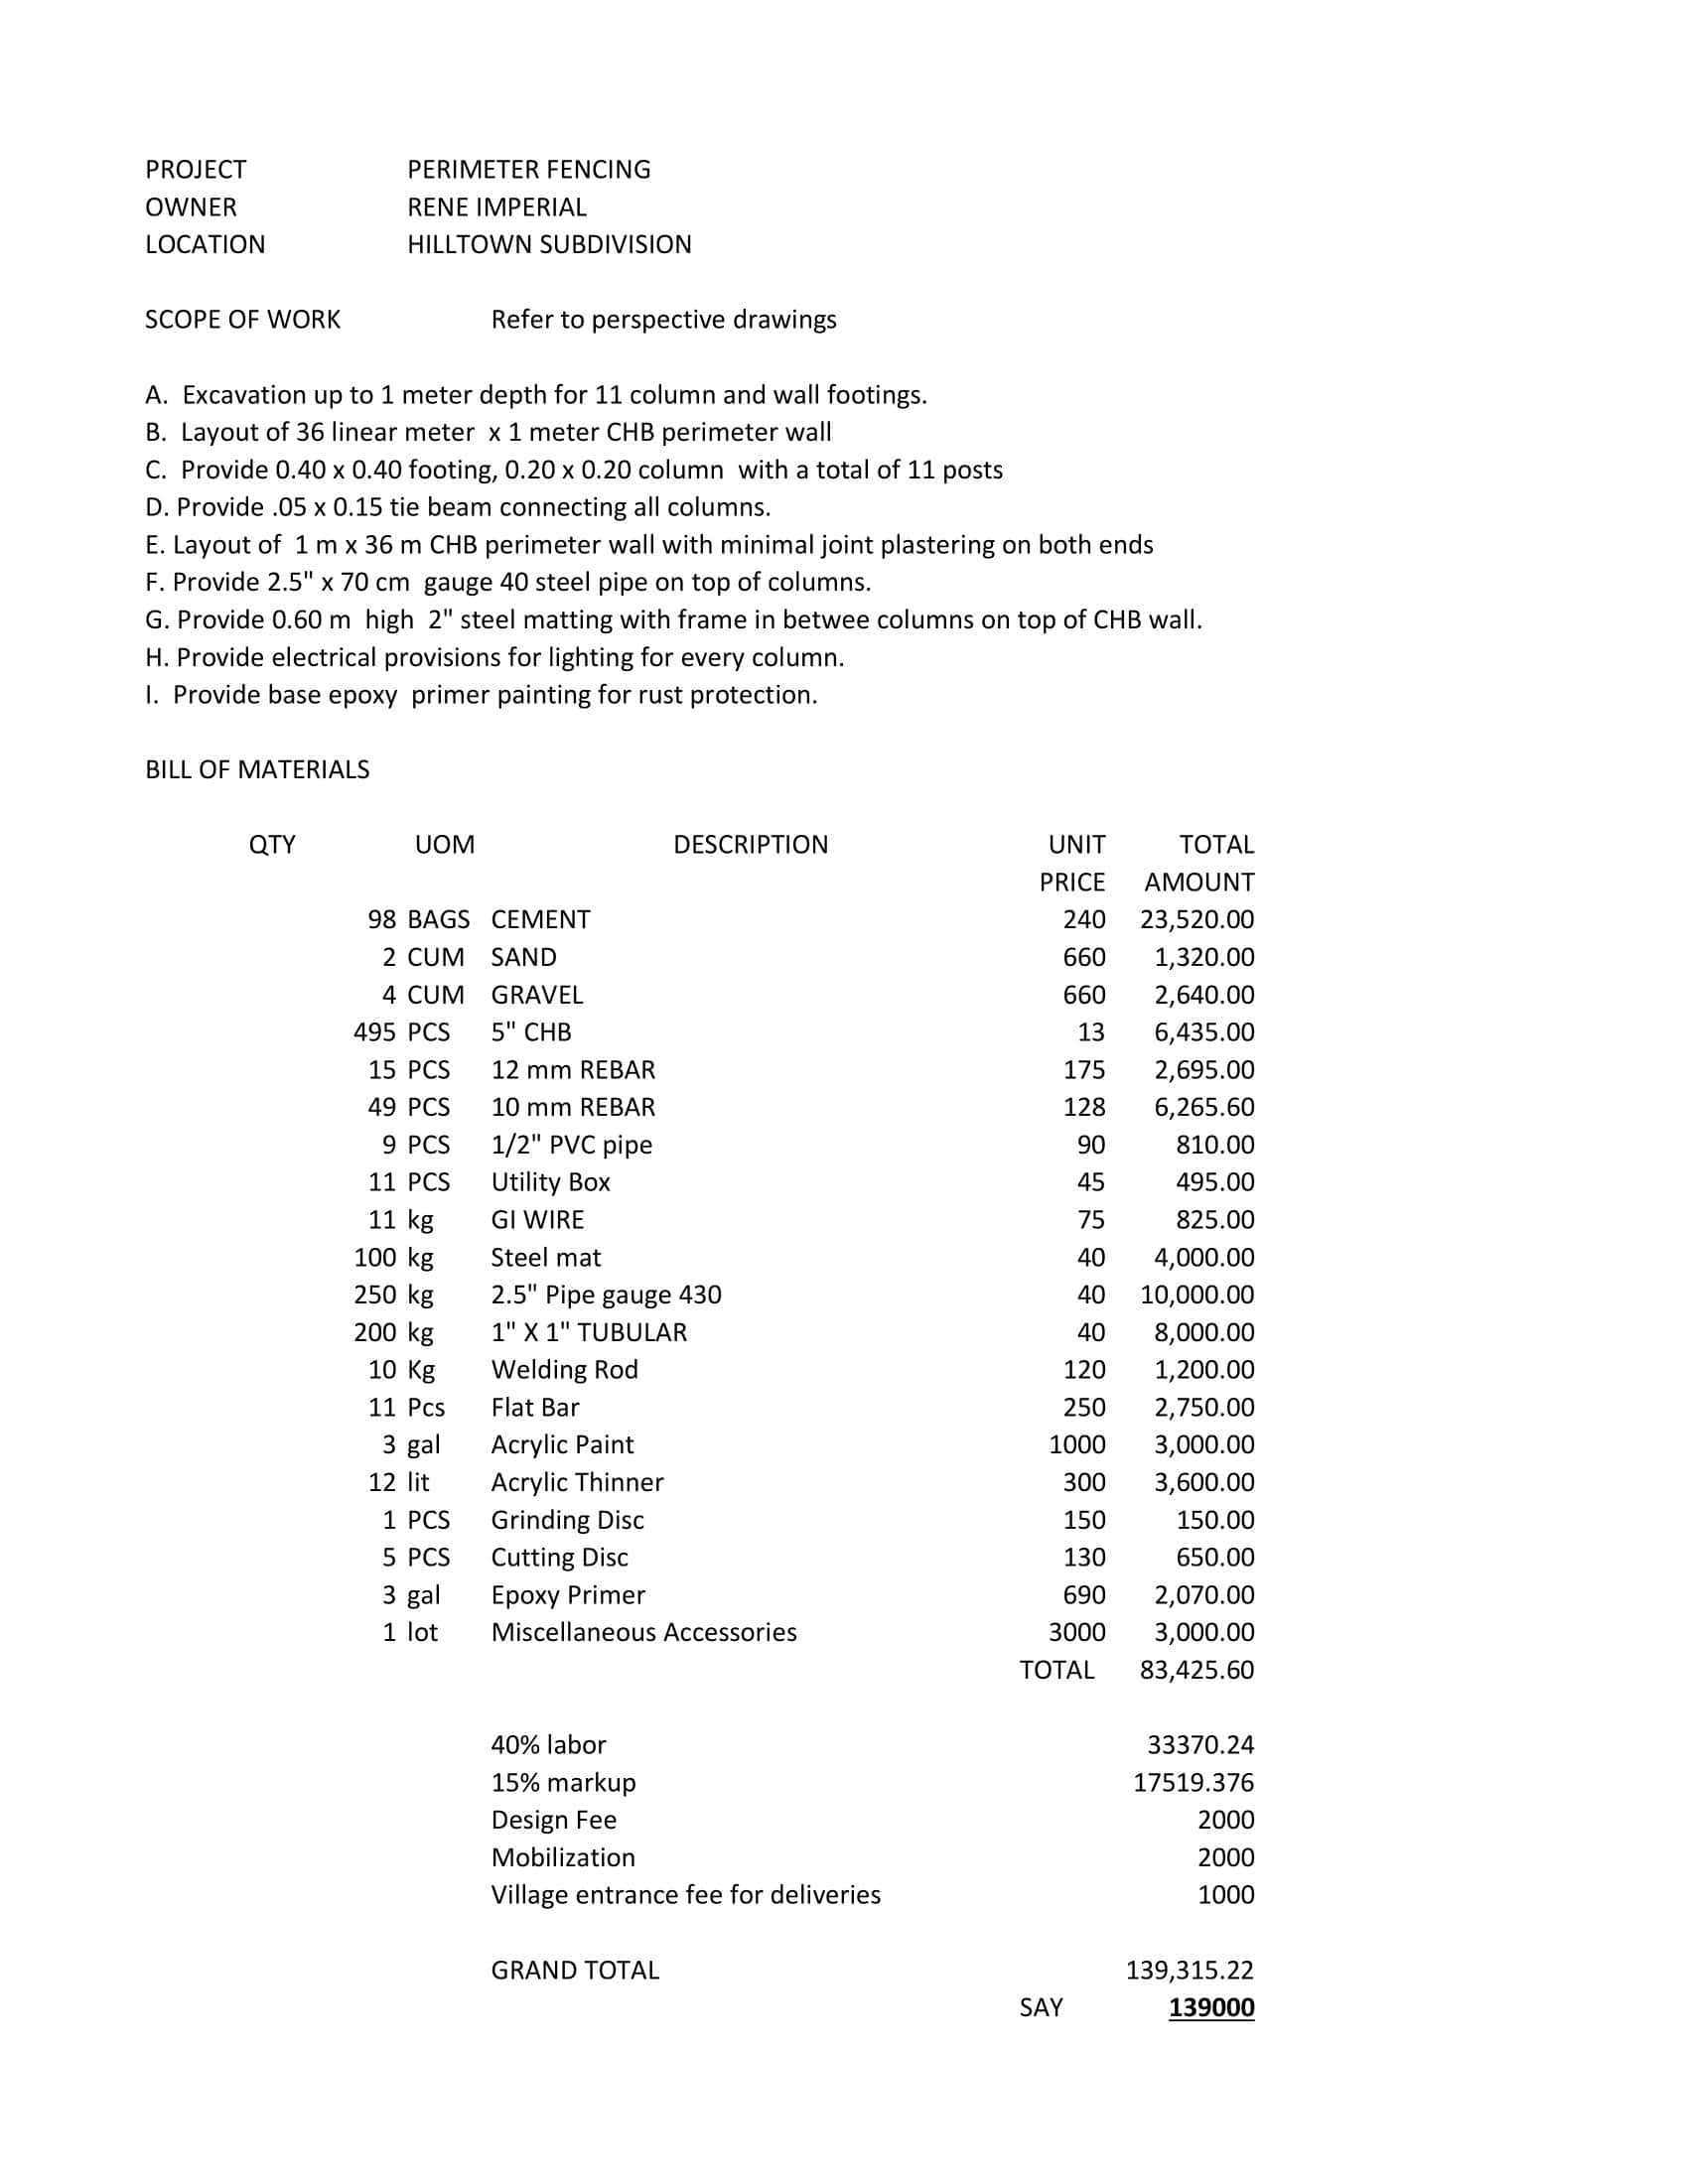
The estimate first captures key details like project type, fence style, dimensions and materials. It then lists out itemized costs including materials, labor, site preparation and fees. Total project price is calculated based on costs and markup. A summary statement is included to define estimate validity terms. The template provides dedicated sections to compile this data.
A professional fence estimate template allows accurate scoping and transparent pricing communication. Itemization of all costs and variables improves understanding of value. Estimates help customers budget for the project and provide useful price comparison across contractors. A standardized template format also streamlines preparation on the provider end.
The Importance of Accurate Fence Estimation

Fencing plays a crucial role in delineating property lines, ensuring privacy, and enhancing security. Whether you’re looking to install a picket fence for aesthetic purposes or a fortified barrier for security, accurate fence estimation is paramount. Let’s delve into the reasons why precise estimation is so essential:
- Cost Efficiency: Perhaps the most immediate concern for most homeowners or property developers is the budget. An accurate fence estimate ensures that you can allocate an appropriate budget for the project. Underestimation could lead to unplanned expenses, while overestimation could mean missed opportunities to allocate resources elsewhere.
- Material Waste Reduction: An accurate estimate helps in ordering the correct amount of materials needed for the project. Over-ordering results in unnecessary waste, which not only has financial implications but also environmental concerns, given the surplus material that might end up in landfills. On the other hand, under-ordering can lead to project delays as you wait for additional materials, potentially at a higher cost or different quality.
- Labor Efficiency: Labor is often one of the most significant costs in a fencing project. By providing an accurate fence estimation, you can plan the duration and manpower needed. This allows for optimal scheduling, ensuring that workers are neither overstretched nor underutilized, both of which can lead to increased labor costs.
- Consistent Project Timeline: An accurate estimate ensures a smoother project timeline. If you’ve correctly gauged the amount of material and labor required, you’re less likely to encounter significant disruptions or delays. This is particularly important for commercial projects where delays can have cascading effects on other interconnected tasks or where security concerns demand a timely completion of the fencing.
- Improved Client-Contractor Relations: For contractors, providing an accurate estimate and then delivering on that estimate builds trust with clients. Consistently meeting or exceeding expectations can lead to positive referrals and repeat business. Conversely, frequently revising estimates, especially without clear justification, can erode trust and harm a contractor’s reputation.
- Strategic Planning and Decision Making: An accurate fence estimate provides a clear picture of the project’s scope and requirements. This clarity allows homeowners or project managers to make informed decisions, weighing the benefits of different materials, designs, or enhancements against their costs.
- Regulatory and Legal Compliance: In many areas, local regulations dictate specifics about fencing, from height restrictions to material requirements, especially in certain zones or for particular purposes. An accurate estimation process should consider these regulations, ensuring that the project remains compliant and avoiding potential legal complications or the need for costly modifications later on.
Key Components of a Fence Estimate Template
A fence estimate template serves as a standardized tool for fence contractors to provide potential clients with a clear breakdown of the expected costs and tasks involved in a fencing project. When professionally laid out, it can significantly improve communication, prevent misunderstandings, and simplify the decision-making process for the client. Here are the key components that should be included in a comprehensive fence estimate template:
- Header Information:
- Company Name and Logo: Branding the estimate with the contractor’s logo and name helps in establishing professionalism and trust.
- Contact Information: Include phone numbers, email addresses, and physical office locations.
- Estimate Number: For tracking and referencing purposes.
- Date: To specify when the estimate was generated.
- Client Information:
- Name: Full name of the client or property owner.
- Address: Location where the fence installation is to take place.
- Contact Details: Phone number and email address of the client.
- Project Description:
- Type of Fence: Specify whether it’s a chain-link, wood, vinyl, wrought iron, etc.
- Purpose of Fence: E.g., privacy, security, decorative, or animal containment.
- Fence Dimensions: Length, height, and any other relevant measurements.
- Material Breakdown:
- Type and Quantity of Materials: List all materials, such as posts, panels, gates, post caps, etc., along with their quantities.
- Cost Per Unit: The cost of each individual item/material.
- Total Material Cost: Aggregate cost of all materials.
- Labor Costs:
- Number of Laborers: The number of people working on the project.
- Hourly Rate or Flat Rate: Depending on the billing structure.
- Estimated Hours or Days: Total estimated labor time.
- Total Labor Cost: Aggregate labor cost for the project.
- Additional Costs:
- Equipment Rental: If specialized equipment is required.
- Permits and Licensing: Costs associated with securing necessary local permits.
- Transportation and Delivery Fees: If applicable.
- Project Timeline:
- Start Date: The projected commencement date of the project.
- Completion Date: The expected end date.
- Special Considerations or Notes:
- Details about site access, any expected obstacles or challenges, client preferences, or other relevant specifics.
- Warranty Information:
- Details about the warranty for materials and labor. This can include the duration of the warranty and what it covers.
- Total Estimated Cost:
- A clear and concise total, which aggregates materials, labor, and any additional costs.
- Terms and Conditions:
- Payment schedule (e.g., deposit and final payment).
- Potential circumstances that might result in cost adjustments.
- Cancellation fees or protocols.
- Client Acceptance:
- Space for the client’s signature to confirm their acceptance of the estimate and to move forward with the project.
Incorporating Detailed Specifications
Creating an accurate fence quote begins with clear specifications tailored to the client’s property and project scope. Thorough estimates provide details on all particulars including:
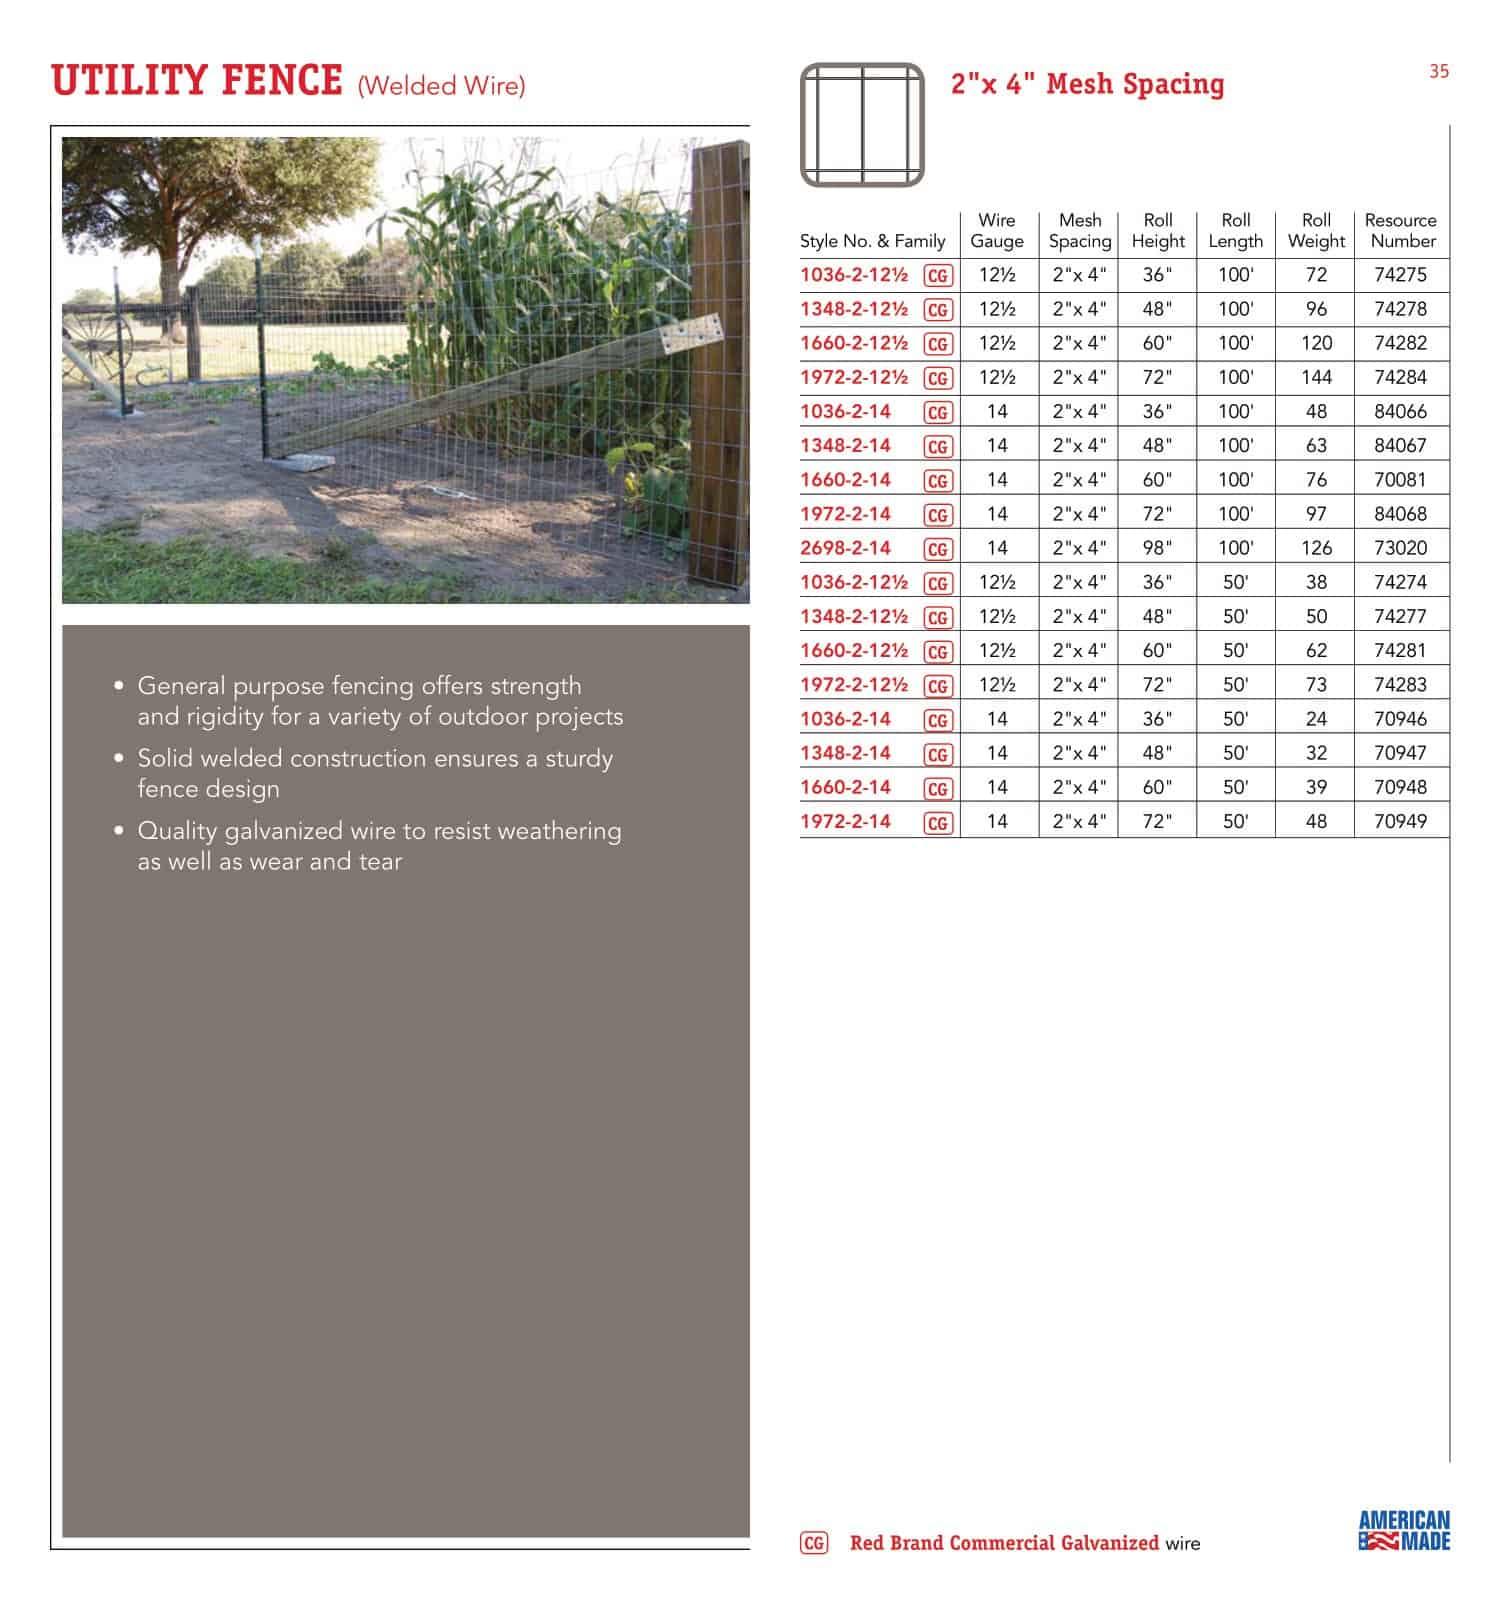
- Fence type and materials – wood, chainlink, vinyl, aluminum etc. Specify grade, texture, dimensions
- Linear footage – Precise measure of perimeter to enclose
- Gate quantity and types – Single, double, arched, sliding, lifting with hardware
- Post spacing – Interval between supporting posts following code
- Privacy level – Height and opacity to achieve goal from seclusion to decoration
- Terrain specifics – Noting slopes, uneven ground requiring extra labor
- Removals – Old fences or vegetation needing disposal
- Additional features – Caps, lights, finials to match style
- Product brands, warranty info – Communicate quality of materials
With meticulous measurement and product details, both contractor and customer can validate the quote covers the agreed upon deliverables.
Breaking Down Costs Effectively
Embarking on any significant project, like fencing, necessitates a thorough and transparent cost breakdown. It allows clients to understand where their money is going and assists contractors in managing resources efficiently. A comprehensive cost assessment prevents budget overruns, ensures that all aspects of the project are adequately funded, and avoids unpleasant surprises upon project completion. Delving into the intricacies of breaking down these costs, from materials to labor and other often-overlooked elements, can make the difference between a smooth-sailing project and one fraught with financial missteps.
Itemizing Material Costs: Tips and Tricks
Materials often constitute a substantial portion of the total project cost, making their accurate estimation paramount. Firstly, it’s vital to list every material type, from primary items like fence panels and posts to minor ones like screws, nails, and brackets. Once itemized, each material’s quality and price range should be considered. While it might be tempting to opt for the cheapest option, remember that quality often corresponds to longevity and fewer maintenance requirements. Engage suppliers early and seek bulk purchase discounts or seasonal promotions. Additionally, leveraging digital tools or software designed for project estimation can assist in itemizing and calculating material costs more accurately. Lastly, always factor in a contingency, a small percentage above your total material estimate, to account for price fluctuations or unforeseen needs.
Calculating Labor: Common Mistakes to Avoid
Labor costs, while seemingly straightforward, are rife with potential miscalculations. A frequent mistake is underestimating the time a project will take, resulting in a cost overrun. To avoid this, it’s essential to understand the project’s scope fully and any challenges that might extend labor hours, such as hard-to-access areas or complex installations.
Additionally, it’s crucial to differentiate between skilled and unskilled labor rates. While unskilled labor might be cheaper, certain tasks demand skilled hands, and failing to account for this can lead to costly mistakes and reworks. Also, avoid the pitfall of failing to account for overtime, especially if project delays seem likely. Incorporate breaks, potential weather disruptions, and other realistic time factors when estimating labor hours.
Considering Additional Costs: From Equipment Rental to Waste Disposal
While materials and labor are at the forefront of cost estimations, several additional costs can easily be overlooked. Equipment rental, for example, is essential for certain tasks, and these costs can accumulate, especially if project delays keep equipment on-site longer than anticipated. Similarly, the need for special tools or machinery for particular fence types or terrains should be factored into the budget. Another crucial aspect is waste disposal.
Projects generate waste, be it excess material, packaging, or old fencing being replaced. Planning for proper disposal not only has cost implications but is also vital from an environmental and regulatory perspective. Lastly, permits or licensing fees, which vary by locality and project type, must be considered. These often-overlooked costs can significantly impact the overall project budget, emphasizing the importance of a holistic cost estimation approach.
How to Estimate Fence Price: A Step-by-Step Guide
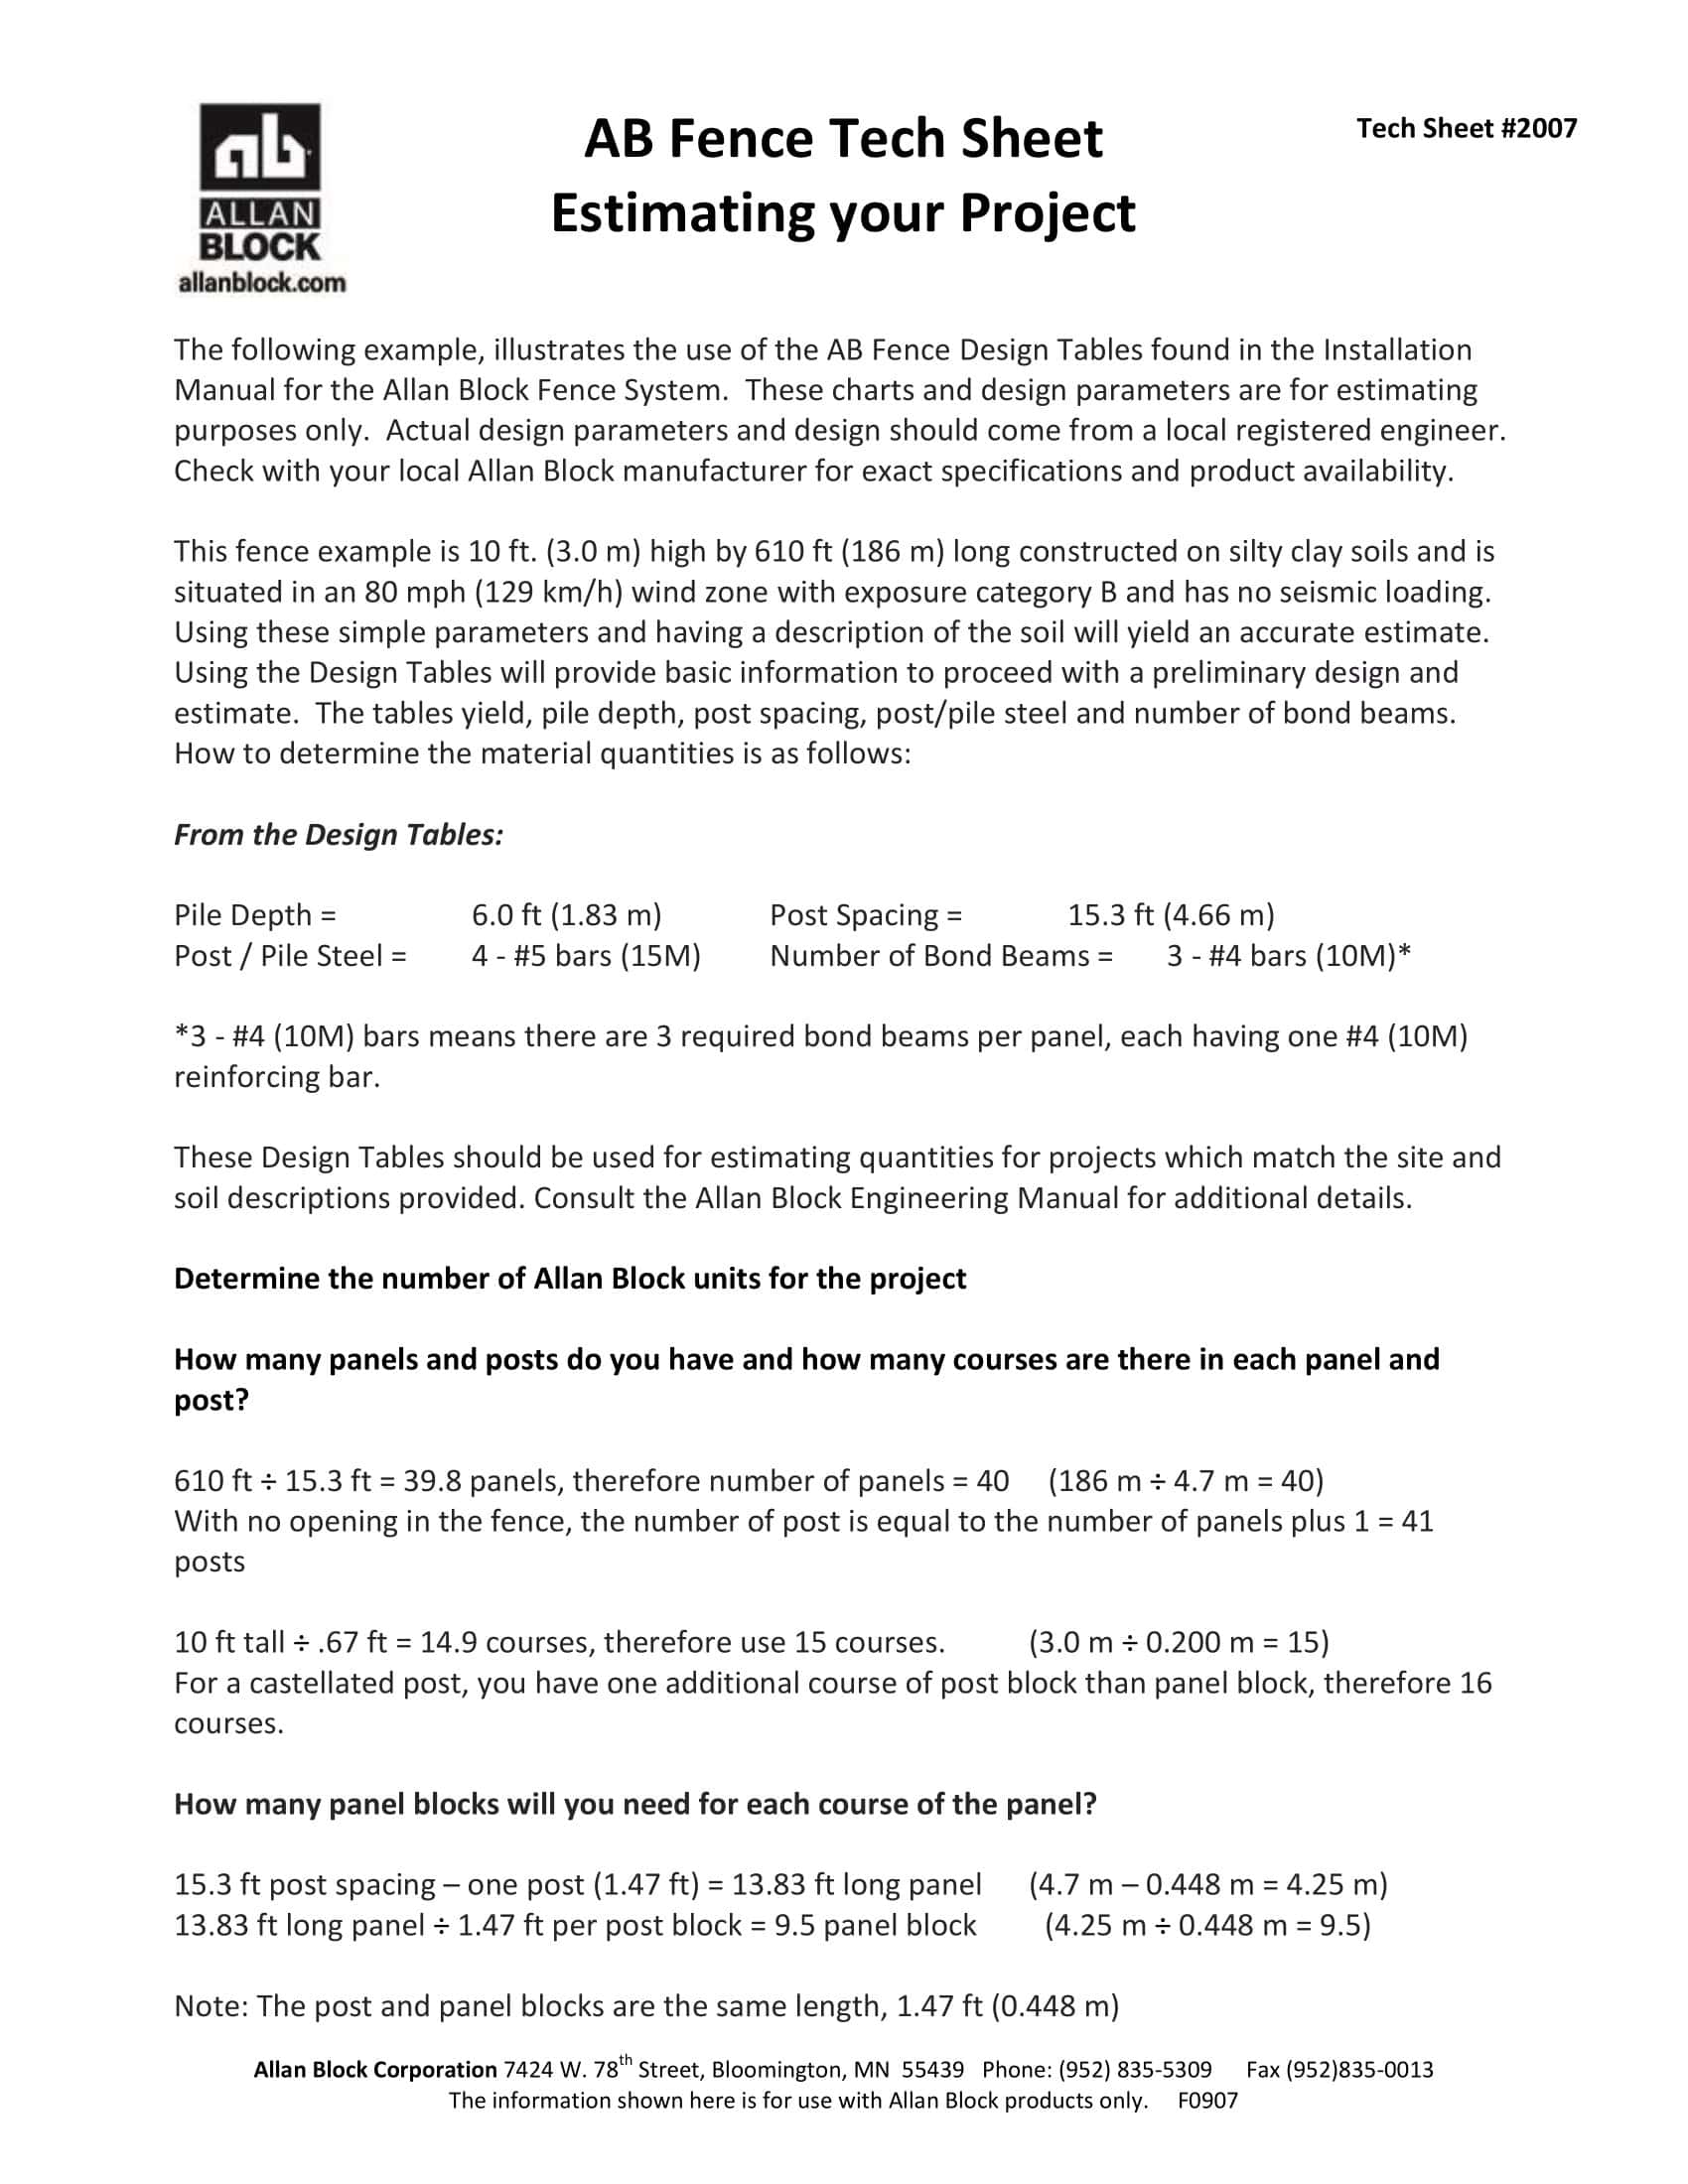
Installing a new fence is a significant investment that requires an accurate estimate of costs for materials, labor, site prep and other expenses. Developing a detailed quoteallows clients to make informed decisions and helps fence contractors provide transparent pricing. Here is a step-by-step guide to producing complete fence estimates:
Step 1: Define the Purpose and Type of the Fence
Before diving into cost estimations, it’s essential to determine the purpose of the fence. Are you aiming for privacy, security, decorative appeal, or perhaps containment for pets? Once you’ve defined the purpose, select a fence type that aligns with your goals. For example, chain-link fences might be ideal for security, while wooden fences offer privacy and aesthetic appeal.
Example: Let’s say you want a fence for privacy. After some research, you decide on a 6-foot tall wooden fence for its height and natural look.
Step 2: Measure and Map Out the Area
Accurately measure the perimeter of the area you want to enclose. This will give you the total length of the fence required. Use stakes and string to mark out the fence line and measure using a tape measure. Always measure twice to ensure accuracy.
Example: You measure the area of your backyard and find that the total length of the desired fence is 200 feet.
Step 3: Determine Fence Paneling, Post Spacing, and Gate Requirements
Decide on the size of the fence panels you’ll be using. Commonly, wooden fence panels are 8 feet in length. You’ll also need to determine the spacing for fence posts, which typically are placed every 6 to 8 feet. Remember to factor in gates: where they’ll be placed, how many you need, and their sizes.
Example: For your 200-foot fence, if you choose 8-foot panels, you’ll need 25 panels. If posts are placed every 8 feet, you’ll need 26 posts. You decide on one 4-foot wide gate for pedestrian access.
Step 4: Itemize Material Costs
List out all the materials required: fence panels, posts, post caps, gates, nails or screws, concrete for post holes, etc. Check local suppliers or online stores for current pricing of these materials. Calculate the total cost of each material by multiplying the unit price by the quantity required.
Example: If one 8-foot wooden fence panel costs $80, for 25 panels, you’d spend $2,000. If each post costs $25, 26 posts would total $650.
Step 5: Estimate Labor Costs
Research the average hourly rate for fence installation in your area. Factor in the total number of hours or days the project is likely to take, considering the length of the fence, terrain complexities, and other variables. Don’t forget to account for potential overtime or additional labor for intricate designs.
Example: If fence installers charge $50 per hour and you estimate that the project will take 40 hours, labor costs would be around $2,000.
Step 6: Factor in Additional Costs
Remember to account for costs beyond materials and labor. This could include equipment rentals, waste disposal fees, or any special tools needed. Additionally, check local regulations and factor in any permit or licensing fees.
Example: Renting a post hole digger might cost $70 for the day. A local permit for fence installation could be $150.
Step 7: Sum Up and Add a Contingency
Once you’ve detailed all the costs, sum them up to get a total estimated price. It’s prudent to add a contingency of around 10-15% to cater to unforeseen expenses or price fluctuations.
Example: If your total from the above calculations comes to $5,000, a 10% contingency would add $500, making the overall budget $5,500.
Step 8: Solicit Multiple Quotes
While your estimate provides a ballpark figure, always solicit quotes from multiple contractors. This not only helps in validating your estimate but might also introduce you to factors you hadn’t considered.
Example: You approach three local fencing contractors. Two quotes come in close to your estimate at $5,400 and $5,600, while a third is much higher at $6,200, citing a need for specialized groundwork.
Fence Material and Post Centers Calculator
When you’re planning a fence, you’ll want a handy way to figure out just how much material you’ll need and how far apart to place the posts. Here’s a breakdown that can help:
1. Calculating Fence Material
Panels: First, figure out how many panels you’ll need. Take the total length of where you want your fence to go and divide it by the length of one panel.
For example, if your fence line is 100 feet long and you’re using panels that are 8 feet each, you’d need roughly 12.5 panels. But since you can’t have half a panel, you’ll need to round up, so that’s 13 panels in total.
Posts: Next, figure out how many posts you need. Normally, you’d take the total length of the fence and divide it by the distance you want between posts. But remember, if you’re using panels, the posts will be at the ends of each panel.
For example, if your fence is 100 feet long and you want posts every 8 feet, you’d typically need about 13. But since you start and end with a post, you’d actually need 14 posts. Sometimes, though, you might adjust the last panel’s width or the distance between the last two posts.
2. How Far Apart Should Posts Be?
Think of this as the space between two posts. Typically, this distance is the length of one panel plus a little extra for the post itself.
For example, if you’re using panels that are 8 feet long and your posts are about 4 inches wide, the center of one post to the center of the next post would be slightly more than 8 feet apart.
3. Don’t Forget the Extras!
Nails or Screws: Think about how many nails or screws you’ll need for each panel and post. If you decide to use six screws for each panel and you have, say, 10 panels, you’d need 60 screws in total.
Concrete: If you’re setting your fence posts in concrete, think about how much concrete you’ll need for each hole the post goes into. This depends on how wide and deep you dig each hole.
For example, imagine you dig a hole that’s 1 foot deep and 9 inches across for a post. You’d need a specific amount of concrete to fill that space. Always buy a little extra concrete to make sure you don’t run out, especially if there’s a bit of spillage or you need to over-fill a hole.
Conclusion
Preparing comprehensive fence installation estimates takes knowledge and diligent attention to detail. To simplify the process, we’ve provided downloadable fence estimate templates covering all necessary line items to generate detailed quotes efficiently. Our fillable PDF forms allow easy customization with specifications, materials, labor costs and all project particulars. Whether you need to price out a basic chain link run or an ornate multi-gate privacy fence, these templates have you covered.
Along with the free estimate forms, we also offer handy fence calculator tools to determine linear footage and material requirements from a simple sketch. Accurate estimates set clear expectations, protect your time investment, and build customer confidence. Use these templates and calculators to create competitive quotes that cover costs while impressing clients with your professionalism.
FAQs
What factors are considered in a fence estimate?
Answer: A fence estimate usually considers factors like the type and quality of material (e.g., wood, vinyl, chain link), total length of the fence, height, the number of gates, any special features or decorative elements, labor costs, and any additional costs such as permits or equipment rentals.
Why do fence estimates vary so much between contractors?
Answer: Estimates can vary due to differences in material quality, labor rates, overhead costs, contractor experience, and the specific tools or methods they use. It’s also possible that contractors might include or exclude certain costs, such as cleanup or disposal fees.
Is the cost of gates included in fence estimates?
Answer: Not always. Some estimates might include a basic gate, but others will price gates separately, especially if they are customized or of a particular design. Always clarify this with the contractor.
How much extra should I budget beyond the fence estimate?
Answer: It’s wise to budget an additional 10-20% beyond the given estimate to cover any unforeseen expenses or changes you might decide upon during the installation process.
How long is a fence estimate valid for?
Answer: Typically, a fence estimate is valid for a limited time, often 30 to 60 days, but it can vary. Material and labor costs can change over time, affecting the estimate.
Can the final cost be higher than the initial fence estimate?
Answer: Yes, the final cost can be higher if unforeseen challenges arise during installation, if there are changes in material costs, or if the scope of the project changes after the estimate is provided. It’s crucial to communicate regularly with the contractor to avoid unexpected costs.









![%100 Free Hoodie Templates [Printable] +PDF 1 Hoodie Template](https://www.typecalendar.com/wp-content/uploads/2023/05/Hoodie-Template-1-150x150.jpg)
![Free Printable Food Diary Templates [Word, Excel, PDF] 2 Food Diary](https://www.typecalendar.com/wp-content/uploads/2023/05/Food-Diary-1-150x150.jpg 150w, https://www.typecalendar.com/wp-content/uploads/2023/05/Food-Diary-1-1200x1200.jpg 1200w)
![Free Printable Roommate Agreement Templates [Word, PDF] 3 Roommate Agreement](https://www.typecalendar.com/wp-content/uploads/2023/06/Roommate-Agreement-150x150.jpg)
